Start/reload Caddy and it will fetch the required certificates and automatically renew them. Your subdomain will now be available over https://.
Intro
When I first started with Home Assistant, a more knowledgeable friend advised me to buy a domain name, and use public DNS entries with private range IP addresses, so that I could use names instead of having to remember IP addresses.
When you install Home Assistant, it’ll announce itself on your local network as homeassistant.local using mDNS, but for one reason or another it doesn’t always work, nor it will it work for all devices. Using a domain gives you a solution that works all the time, every time. And for less than 10 euro a year, it’s just not worth wasting time figuring out why mDNS and .local addresses aren’t working.
Why use a domain
With a domain, you can just point the DNS entry to the local IP address of your host, and the DNS infrastructure then translates homeassistant.example.com to 192.168.1.23 (or whatever IP you map it to).
This is much easier than remembering a IP address.
If you are self-hosting multiple services on the same machine, you will end up having to remember the ports for your services, ie, server.example.com:8123 for Home Assistant and server.example.com:8010 for Paperless-ngx.
The reverse proxy
The solution for this is to use a reverse-proxy.
This way, you can combine the above, create a single wildcard DNS entry for *.example.com (meaning, any subdomain), point them all to your reverse-proxy’s private IP address, and then let the reverse proxy handle all of the routing.
This allows you to set individual names for your services, and the reverse proxy then routes each request to the right host and port. This makes it much more user friendly, as all you need to remember is a name for the service, and the domain.
homeassistant.example.com for Home Assistant,
actual.example.com for Actual Budget,
paperless.example.com for Paperless-ngx,
and so on, for any other service you might self-host.
If you get this far, you might as well add SSL encryption to you services. SSL encryption means you connect to the services over HTTPS. This means that a rogue device on your network can’t just “listen” to the otherwise unencrypted traffic between your devices and your server.
If you own a domain, and if you are going to use a reverse proxy, then adding HTTPS is trivial. Let’s go through the steps.
How to set up HTTPS with Caddy and your own domain name
1. Buy a cheap domain name on Cloudflare or similar
Buy a domain name of your choice. Just make sure to use a service that won’t overcharge you for it, as it’ll be a recurring cost for as long as you keep the domain.
Cloudflare, Porkbun and Namecheap are usually well recommended options.
2. Install Caddy with the Cloudflare module to do DNS validation
Install Caddy via docker or any other alternative method.
You will need a custom build to support DNS-01 challenges.
Serfriz provides docker images with the required modules to support this for Cloudflare, Porkbun and Namecheap, among others. You can also build your own, if you prefer not to trust a third-party.
DNS-01 ACME validation means your server doesn’t need to be publicly reachable. You can keep it all private and secure, entirely restricted to your private IP range.
My Caddy (with Cloudflare module) docker compose
Below is an example of my docker compose and .env files for Caddy.
For simplicity and ease of backup, I prefer to use bind mounts (ie, mount a specific path on the host ) rather than using Docker volumes.
3. Create a DNS entry for your subdomain and point it to the local IP address of the Caddy host
Example: local IP address of the machine hosting Caddy is 192.168.1.23 (you might want to set it to static or reserve the IP address on your router so that it doesn’t change).
You can do this by going to the Cloudflare Dashboard → your domain → DNS → Records
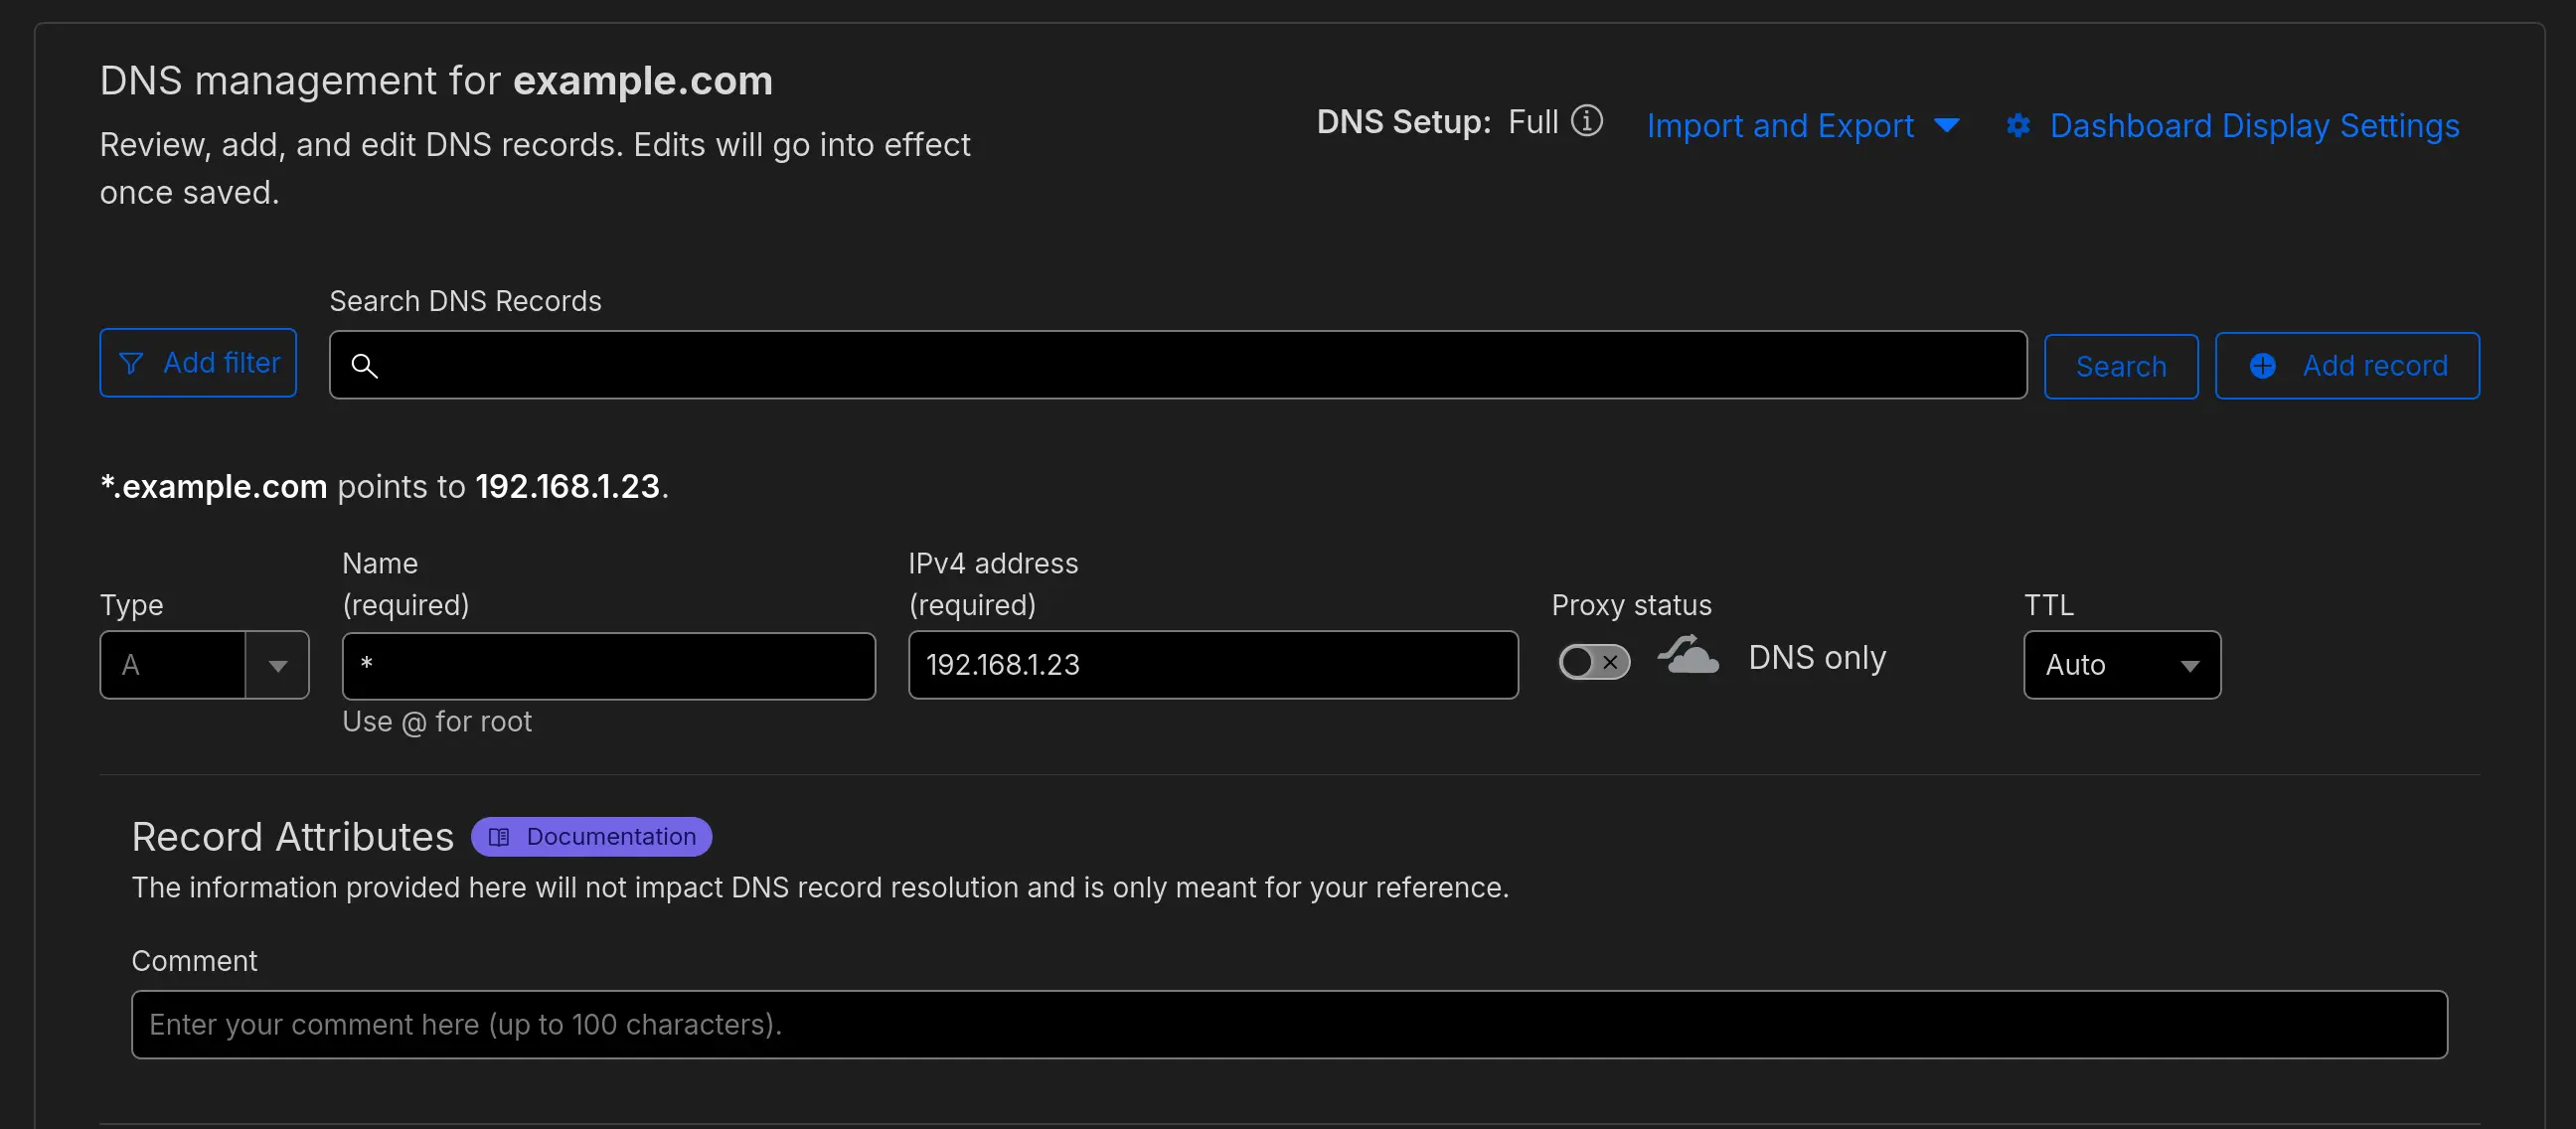
You can create a single wildcard entry ( *. example.com) and point it to 192.168.1.23. You need to make sure the entry isn’t proxied by Cloudflare (the cloud icon should be gray).
Creating a DNS Record entry in Cloudflare
Alternatively, you can create as many specific subdomains as you wish ( service1.example.com, service2.example.com). Point them all to the machine hosting Caddy, which is 192.168.1.23 in our example.
4. Reverse proxy from Caddy to you services
Create a Caddyfile, including all the the required info for the DNS validation modules to work.
At the top of the Caddyfile, we should specify some key details. The below example is using Cloudflare, so the Cloudflare API token would need to be set as an environment variable.
Then, for each service, specify where Caddy should reverse proxy to:
homeassistant.example.com {
	tls {
		dns cloudflare {env.CLOUDFLARE_API_TOKEN} #  for Cloudflare
		resolvers 1.1.1.1
		protocols tls1.3
	}
	reverse_proxy homeassistant:8123
}
If you have multiple services running, you might want to use a wildcard entry instead. It looks a bit more complex but it only requires a single certificate to cover all your subdomains.
Previously, Caddy would obtain individual certificates for every domain in your config literally; now wildcards, if present, will be utilised for subdomains, rather than obtaining individual certificates.
This means that if you were to list each subdomain as a separate entry, Caddy would still fetch a single wildcard server to cover them all.
All of this code and examples are still valid.
The full Caddyfile would include both the Global Config and the site block. In this case I use the tls block as a snippet so it can be reused, and then import it under the domain.
Start Caddy and, if the set up was done correctly, it should automatically fetch SSL certificates to encrypt the connection.
SSL certificates will expire after a certain amount of time. Caddy will monitor this and renew the certificates automatically, without the need for any human intervention. It just works!
We used private IPs for the DNS entries - this means the DNS entry will only resolve when you are connected to your local network.
There is no risk whatsoever in having a domain associated to a private IP address. No one outside will be able to connect to it.
When you type service1.example.com or service2.example.com on your browser, Caddy will route the request to the correct service and port, and it’ll make sure everything is encrypted along the way, so no one can listen in on this traffic!
As a plus, having a valid certificate also prevents your browser from throwing security warnings due to unsecured connections or self-signed certificates.