Run Immich-Go with immich-go upload from-google-photos --server=https://immich.url.tld --api-key=your-api-key --dry-run /path/to/files/takeout-*.zip, using the --dry-run option.
If successful, run again without--dry-run.
Wait until it completes, and all the photos and videos will be uploaded to your instance of Immich.
Start with Google Takeout
Go to Google Photos → Settings → Export your data. You can also access it directly via Google Takeout.
Select a once off export, and use the .zip format and select the 50 GB file size, to minimise the number of parts.
It will take some time for the export to complete. Once it does, Google will send you an email with download links. Make sure to download all the parts.
Get the Immich API key
You can obtain an API key in the user settings panel (Account settings → API Keys → New API Key) on the web interface of your Immich instance. Generate one API key for each Immich user.
Obtaining an API key for your user in Immich
Immich-Go
I have found that the easiest way to actually import your Google Photos into Immich is to use a nice little tool called Immich-Go. It is a terminal tool, but one that is simple to use.
Installing the tool
Install it on the computer you downloaded the Google export into. It’s as simple as downloading the latest release for your platform and extracting. It is also available via brew.
After installation, verify that Immich-Go is working correctly by running immich-go --version. Note that you may need to invoke the program differently when Immich-Go is in the current directory:
Linux, macOS, FreeBSD: ./immich-go
Windows: .\immich-go
This should display the version number of Immich-Go and tell you it’s working.
Importing your Photos
Next, it’s time to run the import. I recommend you check the documentation for all the options available.
At the very least you should run it with --dry-run to simulate all server actions, before trying it for real. You can also use --date-range=YYYY to try it with a single year, as a test, or to split the work over multiple sessions. Restarting an interrupted import won’t cause any problems and will resume where it left off, without causing duplicates.
Here is the basic command to upload the Takeout export from Google Photos to your Immich server, keeping any existing Google Photos Albums.
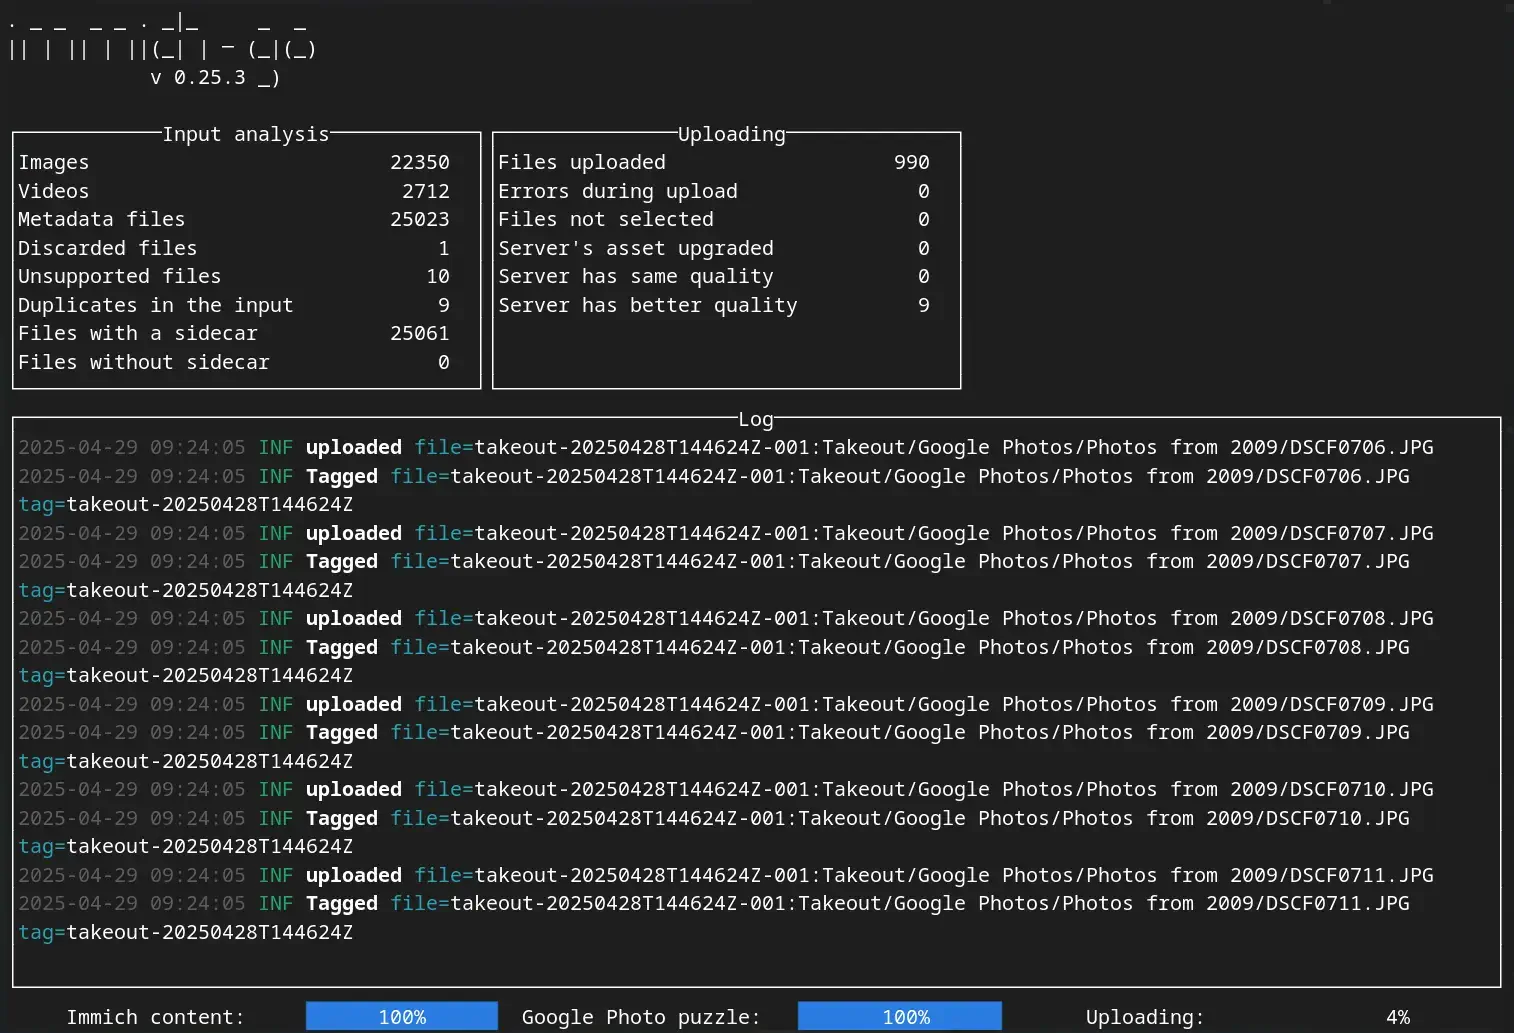
Check for any errors or failures. If successful, run again without--dry-run. This will run the process for real, and actually upload the photos to your instance.
Immich-Go running and handling an import from Google Photos.
Other use cases
Immich-Go is also useful for other uses. I use it whenever I want to import photos from my digital camera’s SD card.
You can upload from a specific folder by using the following command:
Let the process run. If there is any error you can always rerun the process, as there is built in functionality to avoid duplication.
Immich-Go's successful completion confirmation.
When the process is finished you should a confirmation message, and you will then be able to see all your photos in Immich.
The server will have to chew through all the photos and run all the different jobs, which might take a while. If you have specific hardware, like a gaming PC, you can set up an Immich remote machine learning container to speed up the process.
Don’t forget to backup!
If you are getting rid of Google Photos, make sure you set up backups to avoid any future regrets.