Immich Machine Learning with external NVIDIA GPU
tldr: setting up remote machine learning in Immich
- Run the
immich machine learningcontainer in the remote machine of your choice, using docker or podman.- Open Immich in the browser, go to Administration → Settings → Machine Learning Settings, and add the URL of the remote machine learning container:
http://your_remote_nvidia_machineip:3003- (Optional) Change the Smart Search CLIP model to the improved model of your choice.
What is Immich?
Immich is an open-source self-hosted photo and video backup solution. It allows users to create their own private cloud for storing, organising, and sharing multimedia files. Essentially, Immich provides a way to store and access photos and videos on a personal server, replacing third-party cloud services like Google Photos or iCloud.
Machine Learning?
My Immich server currently runs on the same host (a MiniPC) as most of my other self-hosted services, as docker containers. It includes a container (immich-machine-learning) that is used solely for Machine Learning. It is used to automatically categorise and label your photos. For example, it can identify objects, foods, animals, people, locations, and even specific events in your photos. This is essentially what’s behind the ability of the system to return the results when you search for cats or pizza on Google Photos/iCloud (and Immich too).
Machine Learning models
Immich ships with a basic ML model out of the box (ViT-B-32_openai), which works decently enough, although I found it to be a bit worse than Google Photos.
However, it gives you the ability to swap the model for something a bit more accurate. This comes with a trade-off: some of the models take as much as 70 times more computing power than the default model. This means it will require beefier hardware (or alternatively, more time to crunch through all the numbers).
The top end models end up using far too much resources (memory and computing power) with just a very marginal benefit. Ultimately, I decided on the VIT-L-16-SigLIP-384_webli model, on the basis that it provided a good balance.
Speeding up ML with a NVIDIA GPU
My photo library has over 13,000 photos, all of which would have to be reprocessed with the new model.
I own a gaming computer with a NVIDIA 3080 RTX GPU.
Last month I finally gave up on Windows, and installed Bazzite on this machine.
This was the perfect excuse to see if I could run the Immich Machine Learning container on the NVIDIA GPU to accelerate the process.
Running with docker compose
If you are using Immich, chances are that you are already using Docker. As such, I’ll refrain from going into full detail.
The official documentation is available here.
It’s as simple as copying the compose.yml for the immich-machine-learning container, adapting to match your hardware (in this case, the NVIDIA GPU), and starting the container.
Quadlets and podman containers
Bazzite has built in support for Quadlets as a way to run podman containers. Although you can still install Docker, I found it easier to just adapt and use the built in functionality for containers.
I had to do a bit of digging but eventually found out how to setup the container via Quadlets. The below has been tested and is working as intended.
Create a file called ~/.config/containers/systemd/immich-machine-learning.container
[Container]
ContainerName=immich-machine-learning
Image=ghcr.io/immich-app/immich-machine-learning:release-cuda
AutoUpdate=registry
Volume=immich-model:/cache
PublishPort=3003:3003
SecurityLabelDisable=true
AddDevice=nvidia.com/gpu=all

[Service]
Restart=always
TimeoutStartSec=90

[Install]
WantedBy=default.target
After this, save the file, and start the service.
systemctl --user immich-machine-learning
systemctl --user start immich-machine-learning
If you want the container to be automatically updated, you also need to make sure that podman’s auto update service is enabled overall.
systemctl --user enable --now podman-auto-update.serviceSetting up Immich to use the remote ML container
Next, open Immich in your browser, go into Administration → Settings → Machine Learning Settings, and add the URL corresponding to this machine:
http://your_remote_nvidia_machineip:3003
Save, and Immich will automatically try to use this address for the machine learning server, falling back to the original one if this is offline (which is ideal as I want to keep this machine off most of the time, due to power consumption).
You might want to either disable Availability Checks or to adjust the Check Interval. By default, it is set to 30 seconds, and Immich will ping the remote URL every interval.
Since my machine is off most of the time, this is a bit wasteful. I only noticed when I recently upgraded my router to a Unifi Gateway and saw thousands of these requests.
I changed it to 15 minutes. Immich will obviously not use the remote machine learning server unless it is online, so this does mean that that it could take up to 15 minutes for it to be seen as back online by Immich.
Changing the Smart Search CLIP model
In the same screen, I also changed the Smart Search CLIP model to my new pick: VIT-L-16-SigLIP-384_webli, instead of the default ViT-B-32_openai.
I saved, went to Jobs, and re-triggered the full Smart Search job, for all my photos1.
It took less than 10 minutes to go over 13,000 photos on the Nvidia 3080 GPU!
Comparison with Google Photos
At the moment (until Immich reaches a stable version), I am still running Google Photos in parallel with Immich. It is therefore very easy to run the same search in both apps, and compare the results I get back. I took “Eiffel Tower” as the search topic, something iconic and random, just for this experiment. I actually have no photos of the Eiffel Tower in my libraries, so I wanted to see what came up.

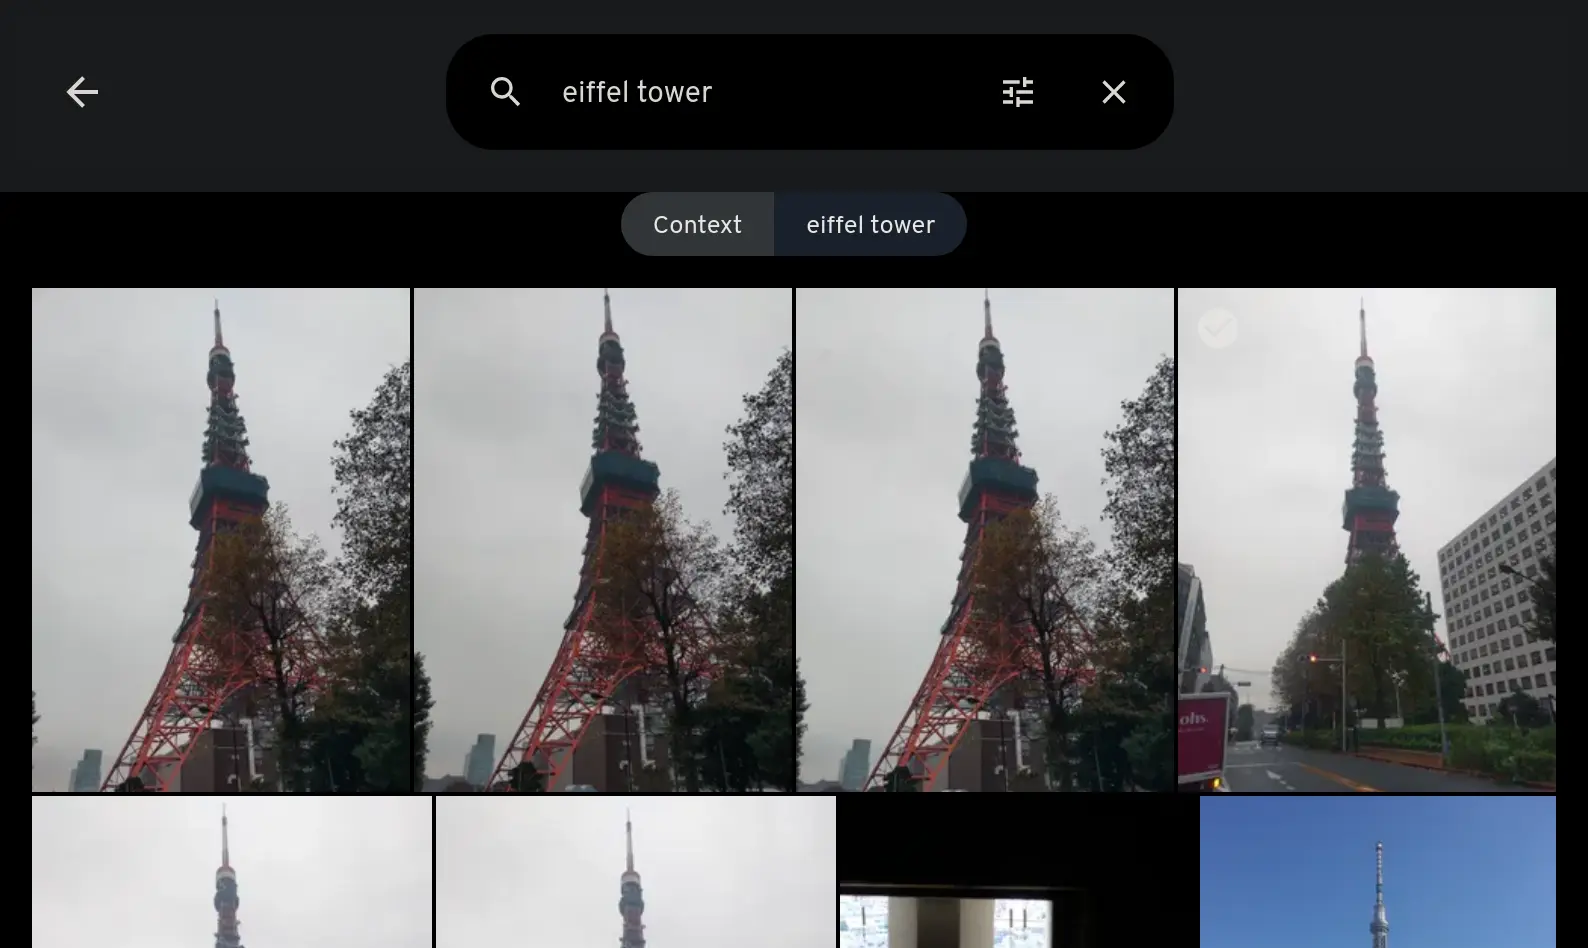
Google Photos returns no results whatsoever. Immich returned some pictures of the Tokyo Tower. In the context of the search, this makes sense, as visually both are very similar - and that’s exactly what the models are supposed to capture. I tried a number of different search terms, from animals to food types, and each time the results were always better than Google Photos (and the original model). Not only did I get more results, but they were also more accurate.
The Results
These models are definitely a big improvement, and if you have the resources to run them, they are definitely worth a try.
The machine with the Nvidia 3080 RTX GPU isn’t always on - Immich will, in that case, default to running the machine learning on the CPU instead, which will take much longer. However, this isn’t an issue when it is only handling a few photos at a time.
If there’s ever a need to process a very large number of photos (for example, during a trip), I can always turn on the machine as needed, and shut it down afterwards.2
Footnotes
-
I also changed the number of concurrent jobs for the Smart Search, from the default 2, to 10. When it finished, I set the number of concurrent jobs back to 2, to avoid issues when running the job on the CPU. ↩
-
This is something I can even do remotely, as I have a shortcut in Home Assistant to wake up or shutdown this machine, on demand. ↩