mTLS via Cloudflare
tldr: steps to set up mTLS via Cloudflare
- Buy a domain or move your domain’s DNS to Cloudflare.
- In the Cloudflare Dashboard, go to SSL/TLS → Client Certificates:
- Input the subdomains to protect with mTLS.
- Create the client certificate with
Generate private key and CSR with Cloudflare- Download and save the certificate somewhere safe.
- Convert the cert from
.pemtoPKCS#12usingopenssl, if required.
- Create a WAF rule in the Cloudflare Dashboard → Security → WAF, under Custom Rules. You can use the following expression, replacing with the subdomains to protect:
((not cf.tls_client_auth.cert_verified or cf.tls_client_auth.cert_revoked) and http.host in {"subdomain1.example.com" "subdomain2.example.com"})
- Install the Client Certificates in the devices you want to allow access from.
What is mutual TLS (mTLS)?
Mutual TLS, or mTLS for short, is a method for mutual authentication. With mTLS, both the client and server have a certificate, and both sides authenticate using their public/private key pair:
- Client connects to server
- Server presents its TLS certificate
- Client verifies the server’s certificate
- Client presents its TLS certificate
- Server verifies the client’s certificate
- Server grants access
- Client and server exchange information over encrypted TLS connection
In short, this ensures that both the server and the client are who they say they are.
Why would you want mTLS?
With mTLS, you can provide your clients (think your phone, or laptop) with the said certificate, and then, while you are away from home, use that certificate as a key to allow your device to communicate with your home server. Any device that tries to connect to your server, and doesn’t have the required key, has it’s connection immediately rejected and terminated. This happens before you even check anything like passwords or user IDs.
As such, it adds a very valuable layer of protection to any services you might be self-hosting, on top of the authentication that serves as a first layer.
When outside our homes, most people would want to use their phones to access their self-hosted services. Installing the mTLS certificate on the phone or corresponding client app that you want to be able to access remotely is a once-off1 step that then makes it possible to access the service in a very frictionless way.
You just open the app on the phone, potentially click to accept the certificate prompt, and that’s it, you’re connected.
This is much simpler than the alternative of connecting a VPN before opening the app - not to say that connecting to a VPN is difficult, but eliminating this step makes it much easier for anyone to use this - which is ideal for my partner, for example.
Window 11 issues when using mTLS certificates
I’m aware of some occasional issues when using mTLS with Windows. As an example, on my partner’s laptop, when using Windows 11, on both Chrome and Firefox, the browser will randomly not prompt you for the certificate, sometimes not even while in incognito/private browsing mode.
A reader ( Ramón ) has kindly shared a tip to get this to work reliably on Windows 11. All it takes is disabling the HTTP/3 (with QUIC) optimisation in the Cloudflare Dashboard.
You can locate that setting through your Cloudflare Dashboard → pick your domain → and then go to Speed → Optimization → Protocol Optimization → HTTP/3 (with QUIC), and make sure to disable it.
There’s nothing preventing you from using two solutions at the same time. If you set an internal subdomain (ie, with a private IP address) and an external subdomain for the same service, you can always use a VPN to access via the internal subdomain without mTLS, while keeping it enabled for anything exposed externally.
Why use Cloudflare to handle mTLS for you
Cloudflare allows you to use their public key infrastructure (PKI) to create client certificates, and to leverage their infrastructure to validate the mTLS client certificates before the connecting client is even routed to your home server.
In my opinion, using Cloudflare is an easier way to implement mTLS, instead of having to deal with the much larger complexity of doing the complete setup yourself, and implementing it at a reverse proxy level.
Caveats
First, this method requires you to be proxying traffic through Cloudflare servers (for the DNS entries) or using a Cloudflare Tunnel. It will not work if someone bypasses Cloudflare and connects to your server directly.
When you use a Cloudflare Tunnel and keep your router ports closed, this is automatic, as your server cannot be accessed directly.
If you have open ports on your router, you need to implement something, at a firewall or reverse proxy level, in order to drop connections from non-Cloudflare IPs.
Second, some people mistrust Cloudflare because their service requires them to be a MIMT (man in the middle), which in theory means they could be eavesdropping on your traffic.
In my opinion, based on Cloudflare’s business model, I think the risk is very small. I would rather rely on their services and take this small risk, and in turn be safe from all the definitely malicious actors out there.
Thirdly, using Cloudflare means using their CDN, which means you are subject to their terms and restrictions. i.e no media servers and 100mb upload limit, which can cause issues if using it with something like Immich.2
Personally, I use a Cloudflare Tunnel because, for me, it is safer - I’m more comfortable with this setup because there’s no risk I could potentially have misconfigured something in my router or firewall.
How to set up mTLS for your subdomains with Cloudflare
It is fairly straightforward to set up and enable mTLS within the Cloudflare Dashboard, but I will provide the steps here, which I have documented while setting this up for my own use.
It should be noted that Cloudflare only allows you to do mTLS validation for subdomains (hosts) under your domain, not the root.3
Creating a client certificate
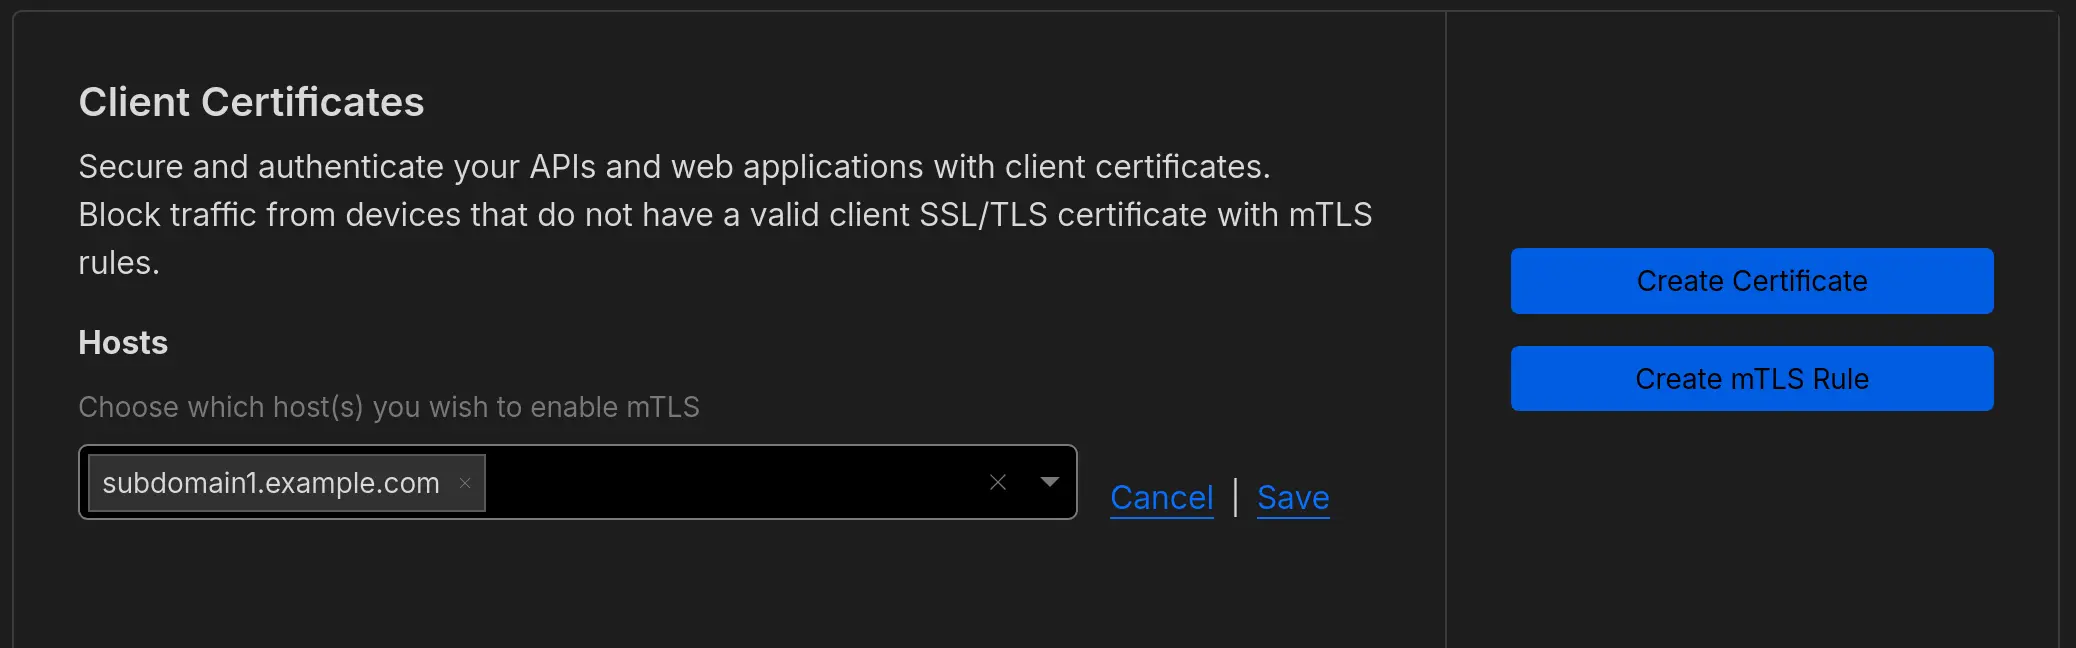
Go to your Cloudflare Dashboard, and within your domain go to SSL/TLS→Client Certificates.
First, specify the hosts (=subdomains) where you want to check for the mTLS certificate. Setting this alone will do nothing, as it will still require the setting up a rule to actually block anything. For this example, let’s say we want to protect subdomain1.example.com. Click edit and insert that subdomain under Hosts
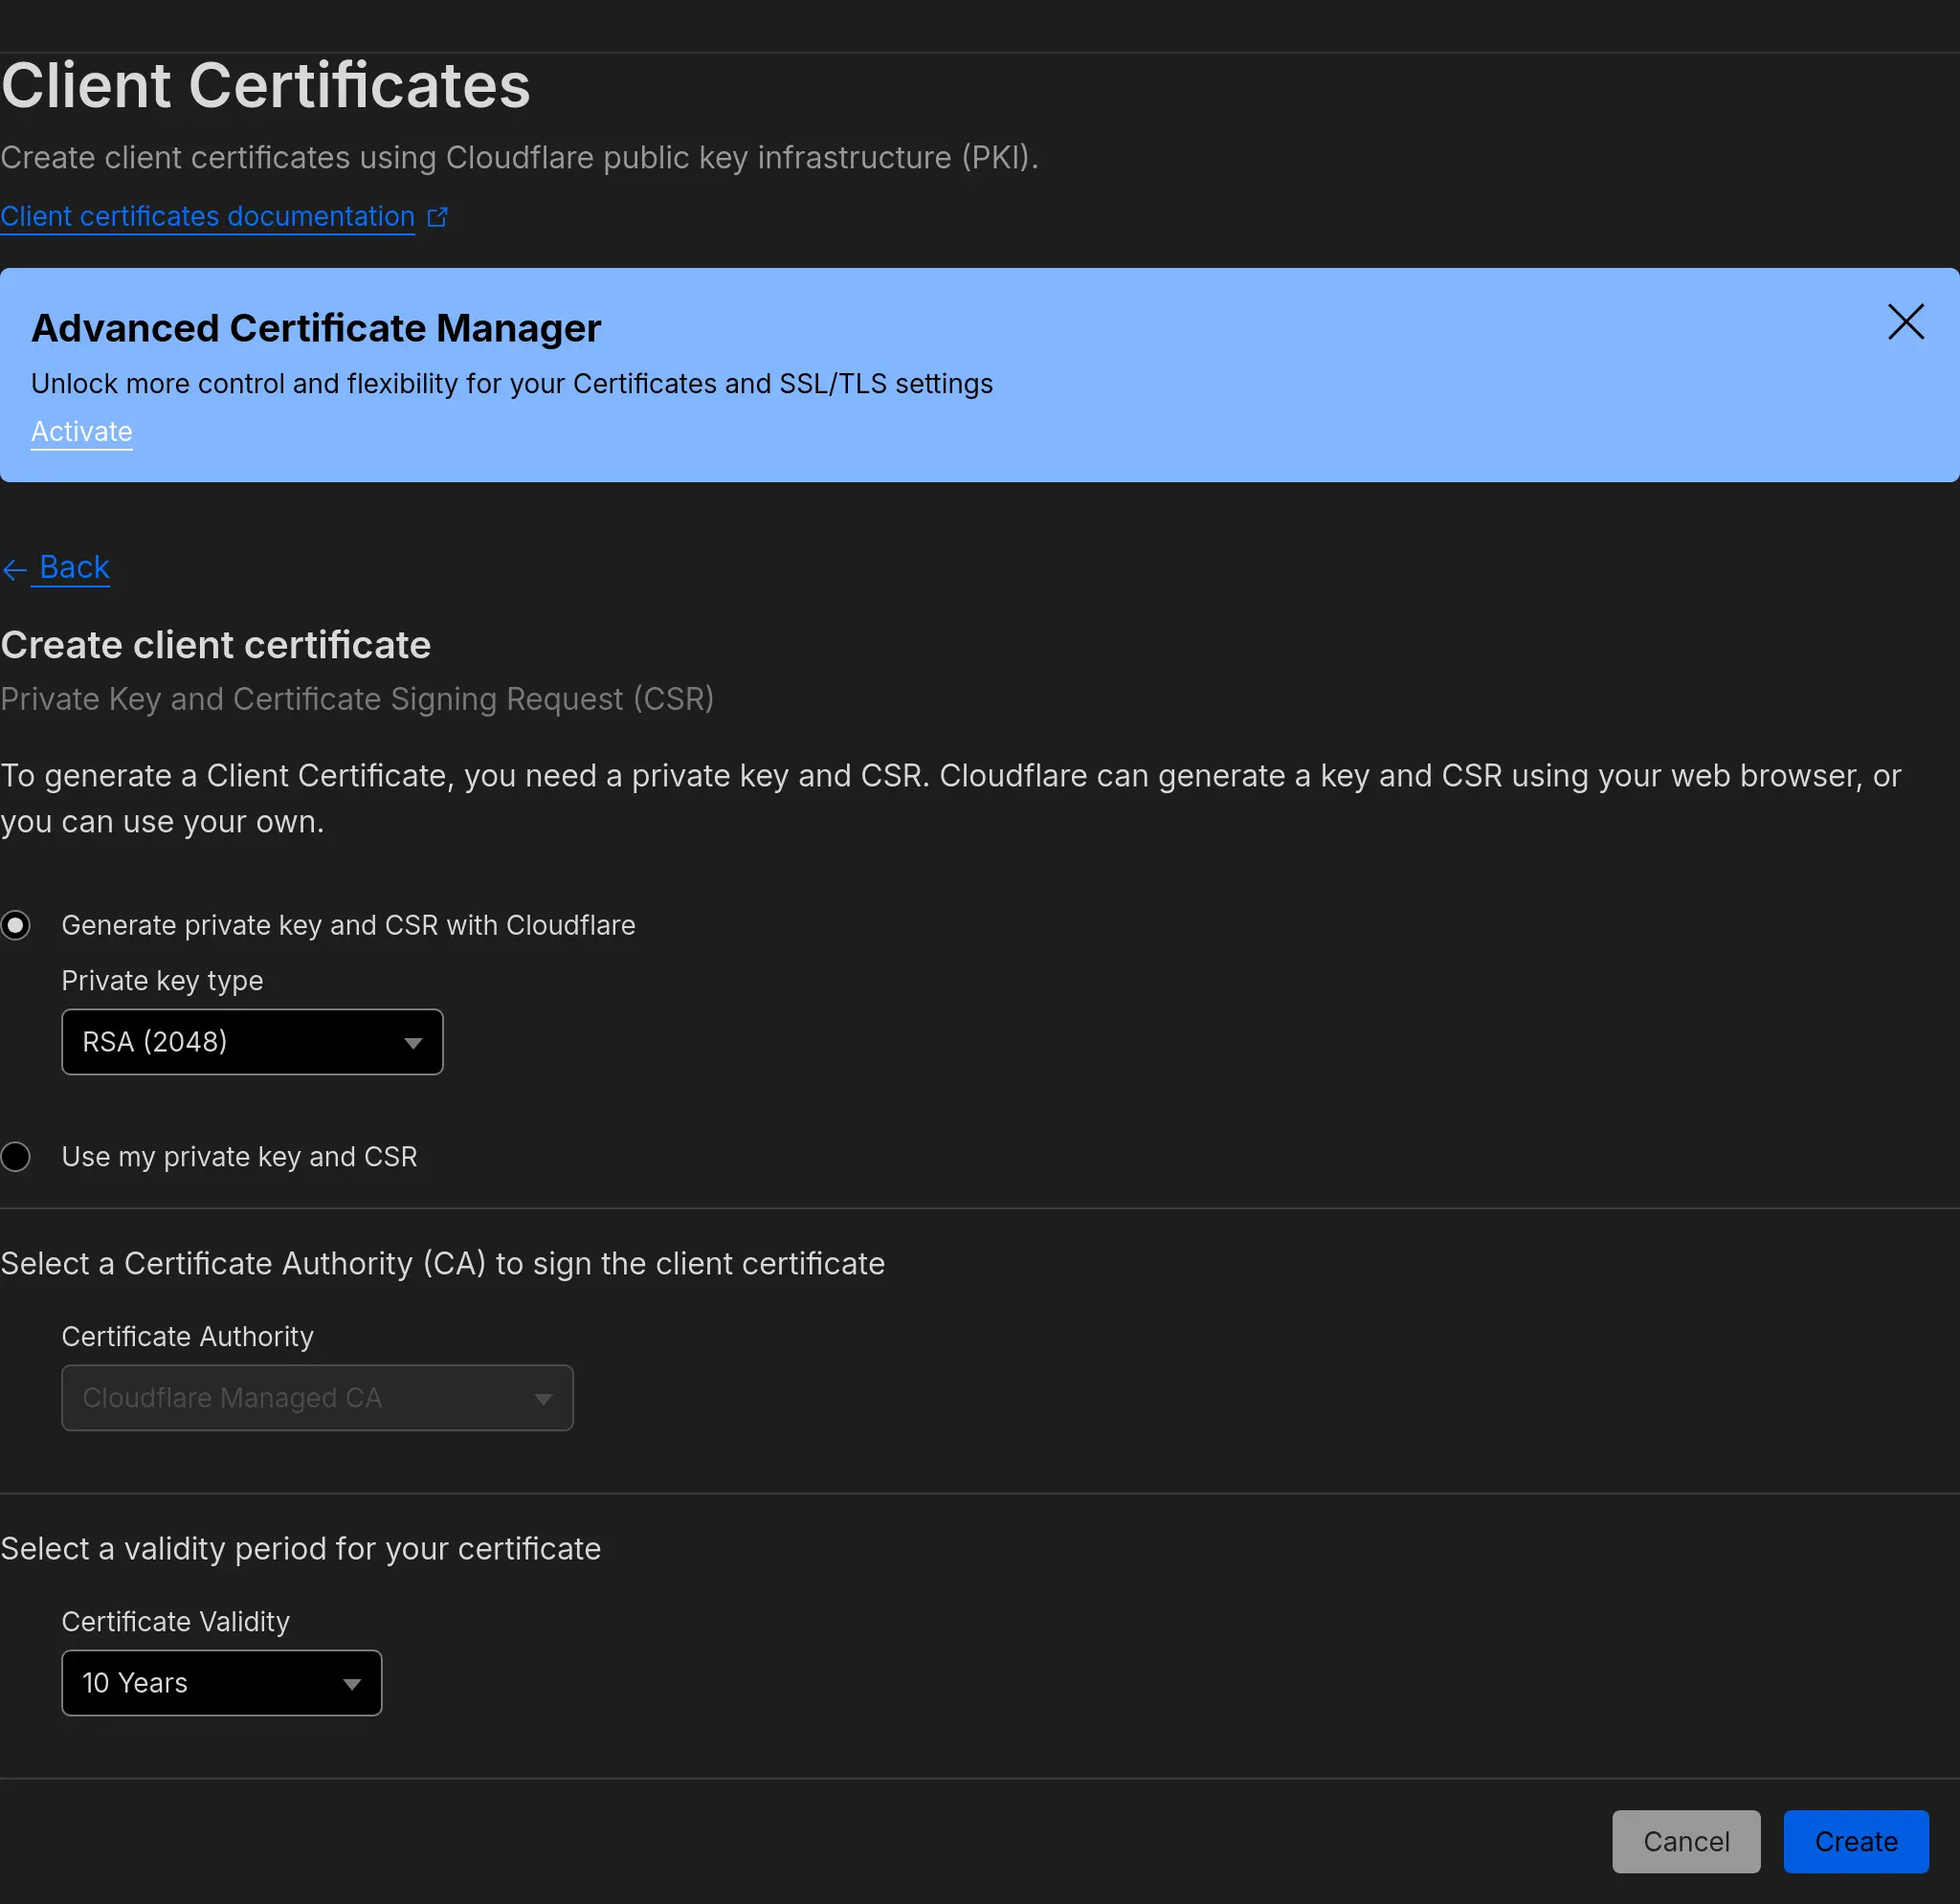
Next, let’s create a Certificate. Click the Create Certificate button, and select Generate private key and CSR with Cloudflare. You can select whatever key type you prefer, RSA (2048) or ECC.4
Set a certificate validity for whatever length you prefer. The certificates can always be revoked, so I went ahead and selected 10 years.
You can create multiple certificates, but the Cloudflare dashboard doesn’t display any distinctive information between them, other than expiration date. An easy solution if you want to issue multiple certificates is to do so on different days or with different validity periods, and then take note of what expiry date corresponds to each cert.
Go ahead and click create, using the standard format (which can always be converted later), and the screen will display 2 sets of info: the certificate and the private key.
Copy each set to a different file (you can use a text file created in notepad), and then save them as certificate.pem and key.pem, or whatever names you want to use. Make sure you store these safely, preferably in a password manager or similar, as they are effectively the key and anyone with access to them will be able to go through the mTLS layer we are setting up.
Convert the .pem to PKCS#12
Many modern devices actually use different file formats for the certificate.
PKCS#12 is one of the most commonly used formats, however some apps require different formats.
.pfx is the same as .p12, if you happen to have an app that requires .pfx specifically, you can just rename the exported .p12 file.
Using the command line and openssl it is easy to convert from the original .pem files to a PKCS#12.
openssl pkcs12 -export -out outfile.p12 -inkey key.pem -in certificate.pemYou will be prompted for a passphrase. This is only required when loading the certificate to a device, not on every usage. As such, go ahead and put something in, rather than leaving it blank, for some additional security.
This will export a outfile.p12 file (you can use a different name).
Cloudflare Zone-level Web Application Firewall (WAF) Rule
You will need to setup a rule in the Cloudflare Dashboard for your domain → Security → WAF, under Custom Rules.
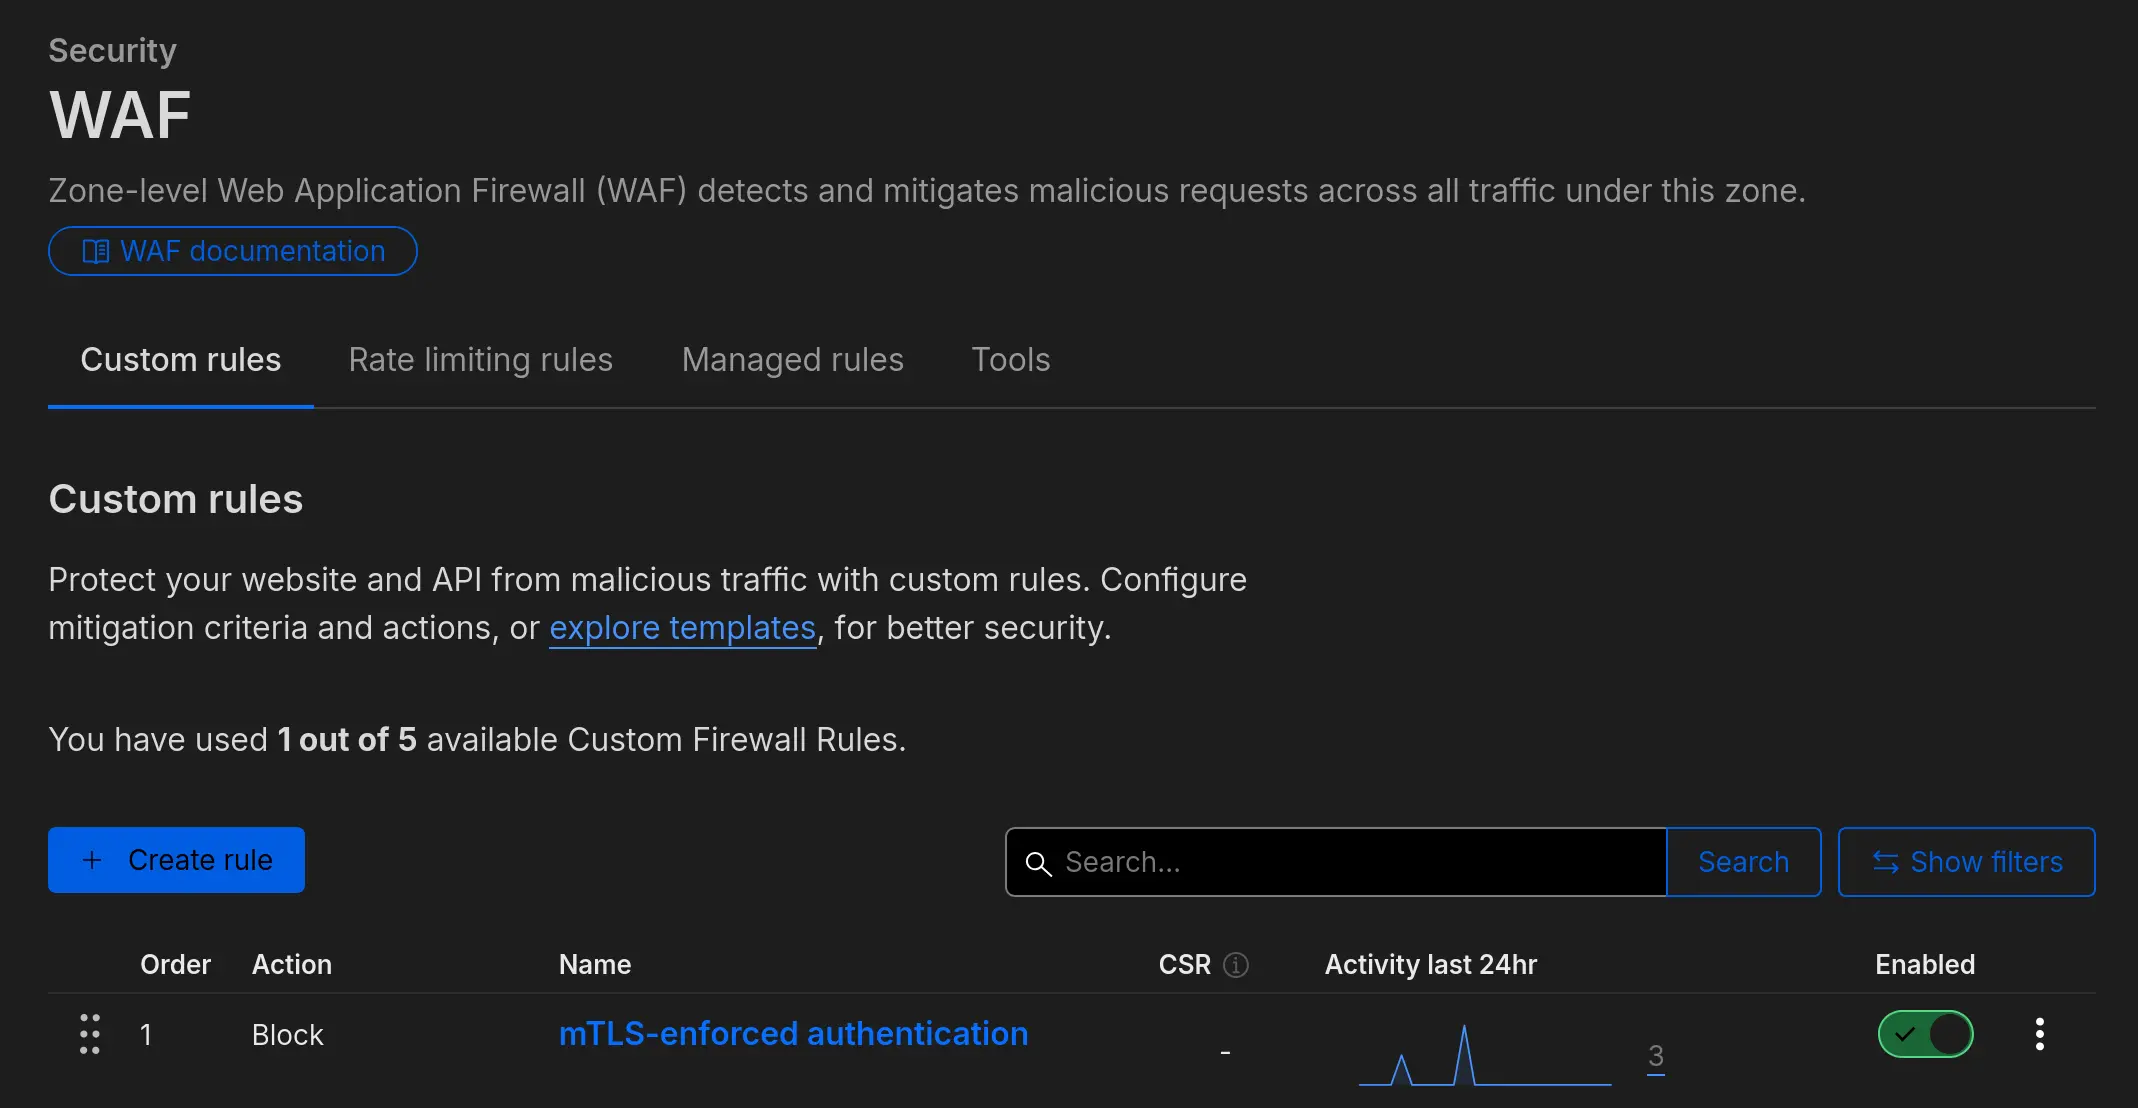
There is a Rule template for mTLS-enforced authentication, but by default, according to Cloudflare’s documentation, it doesn’t check that a certificate hasn’t been revoked.
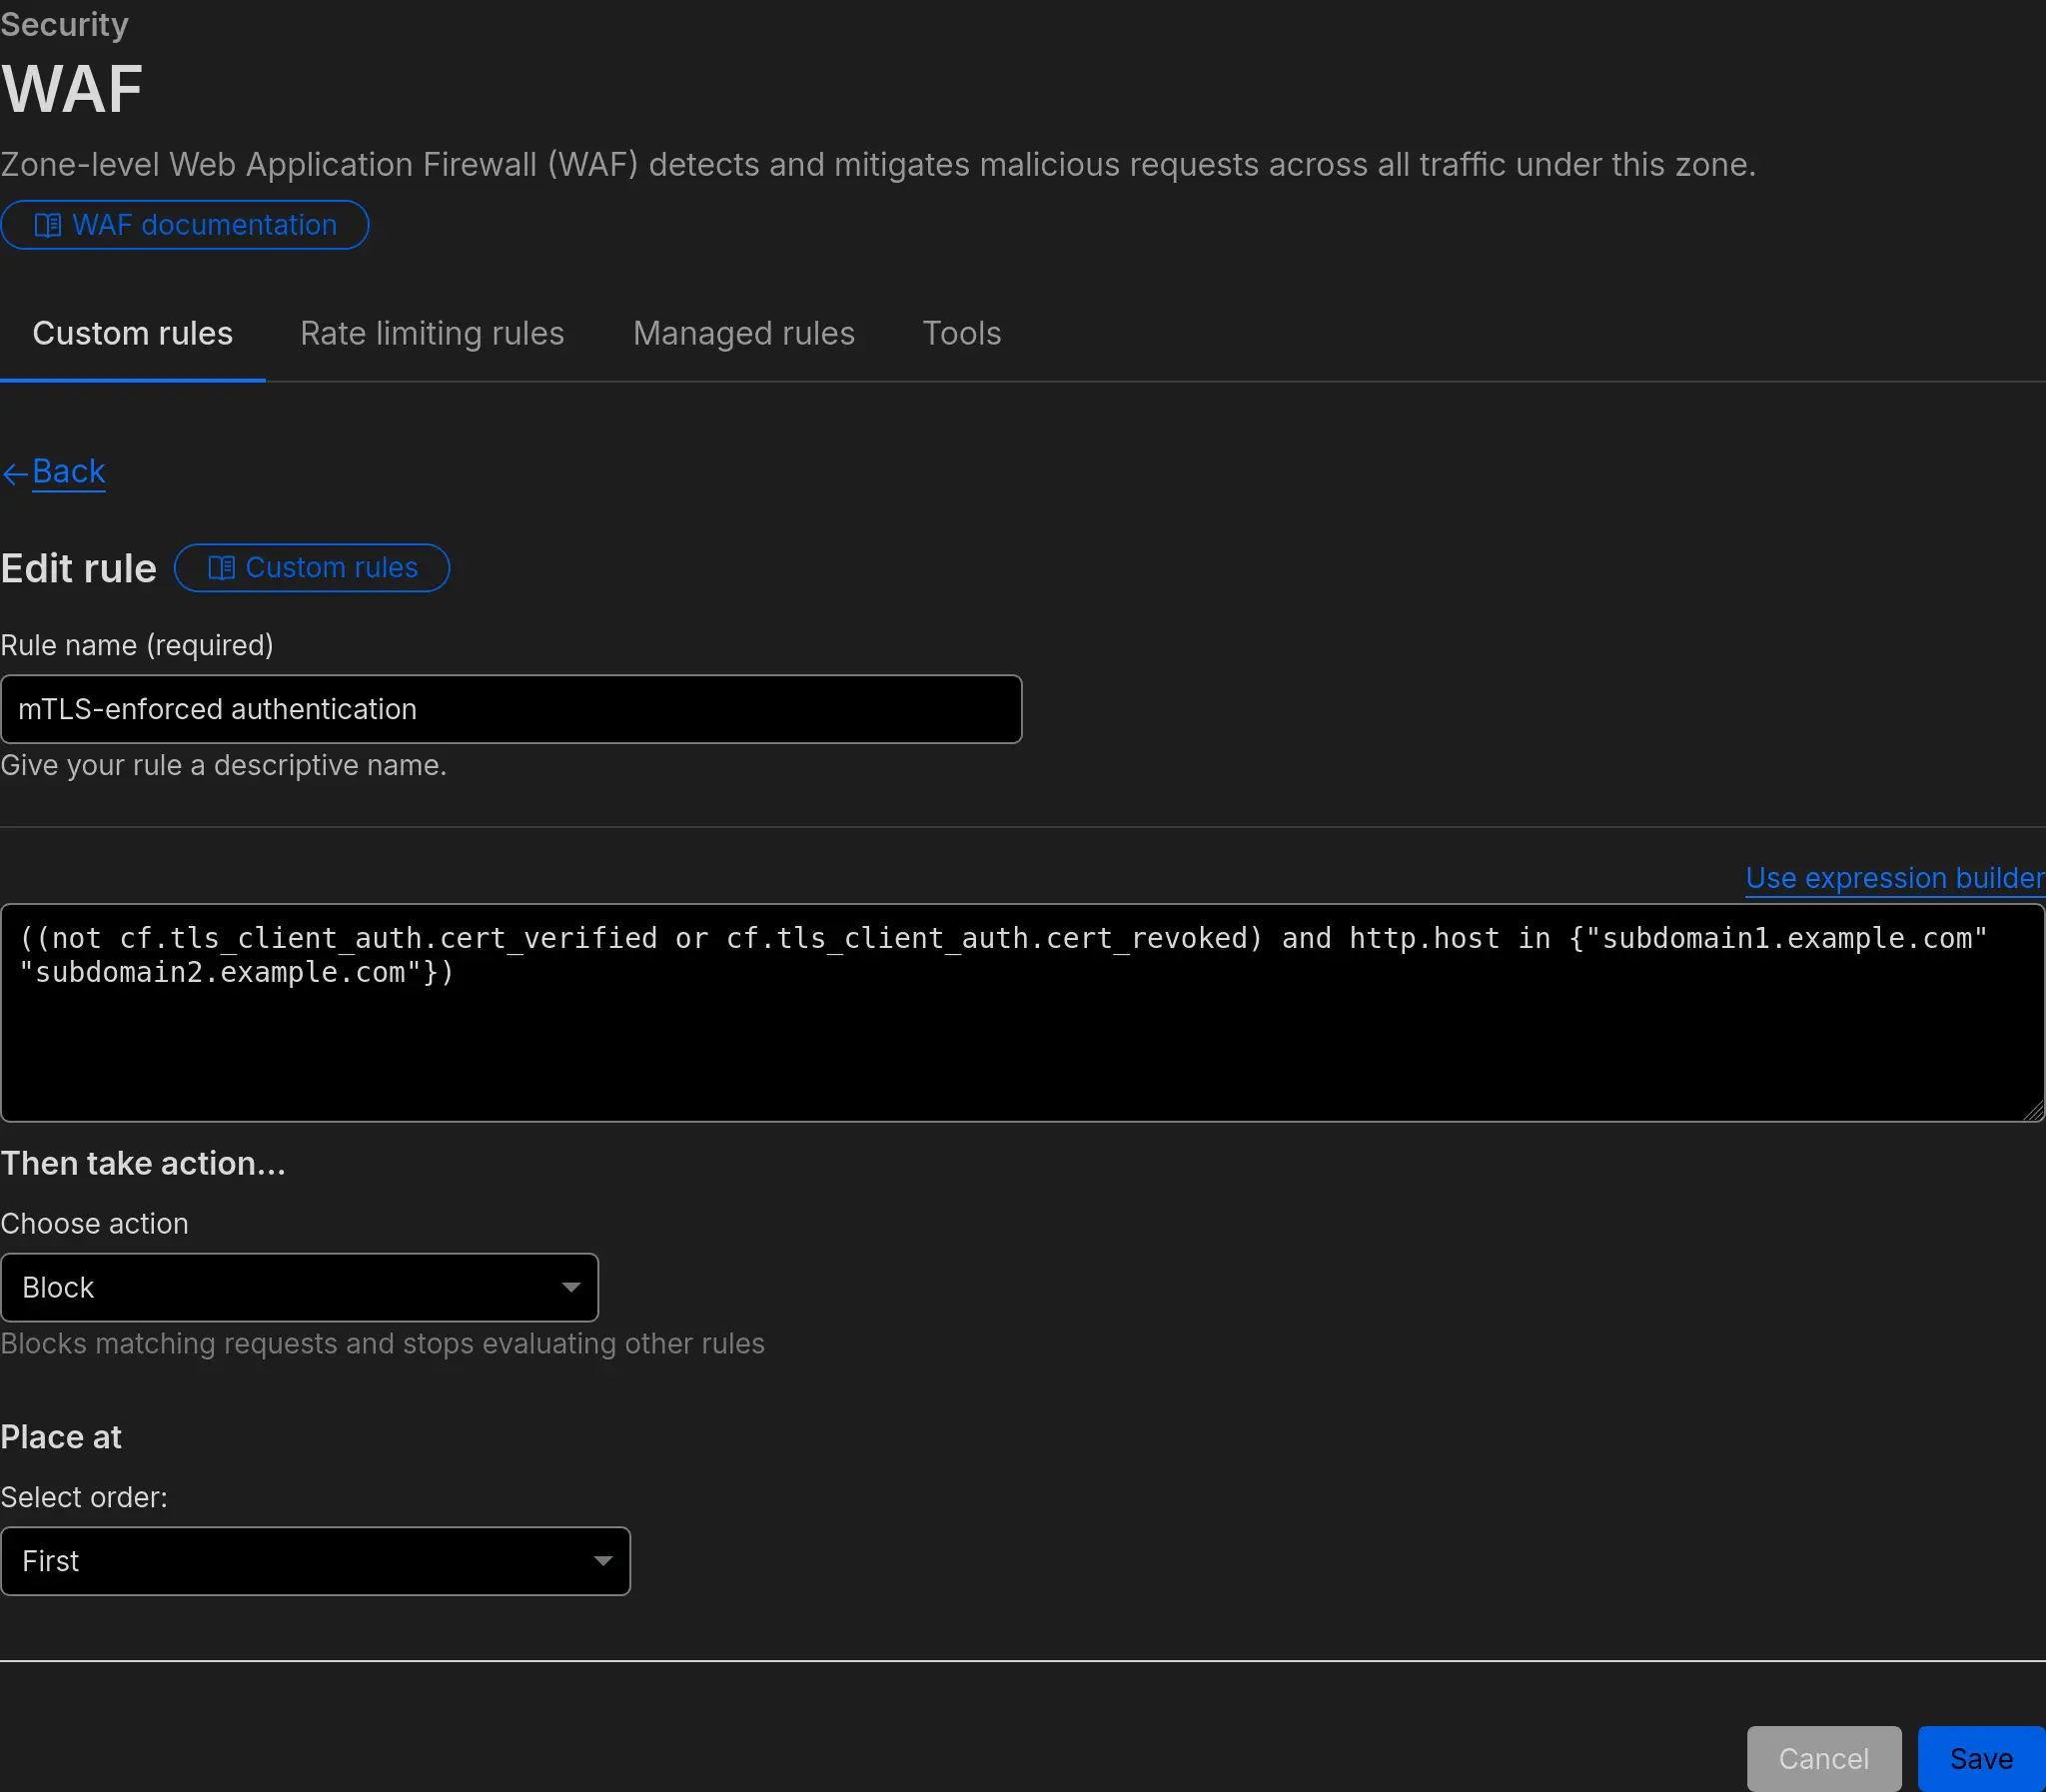
You can use the following expression, replacing with your subdomains to be mTLS protected.
((not cf.tls_client_auth.cert_verified or cf.tls_client_auth.cert_revoked) and http.host in {"subdomain1.example.com" "subdomain2.example.com"})
Make sure you pick the action “Block” to ensure that uncertified devices or devices with revoked certificates are blocked from accessing your services.
Once the rule is live, if you try to access a protected subdomain from your browser, you should see a Sorry, you have been blocked message from Cloudflare. This will show that the blocking rule is working as intended.
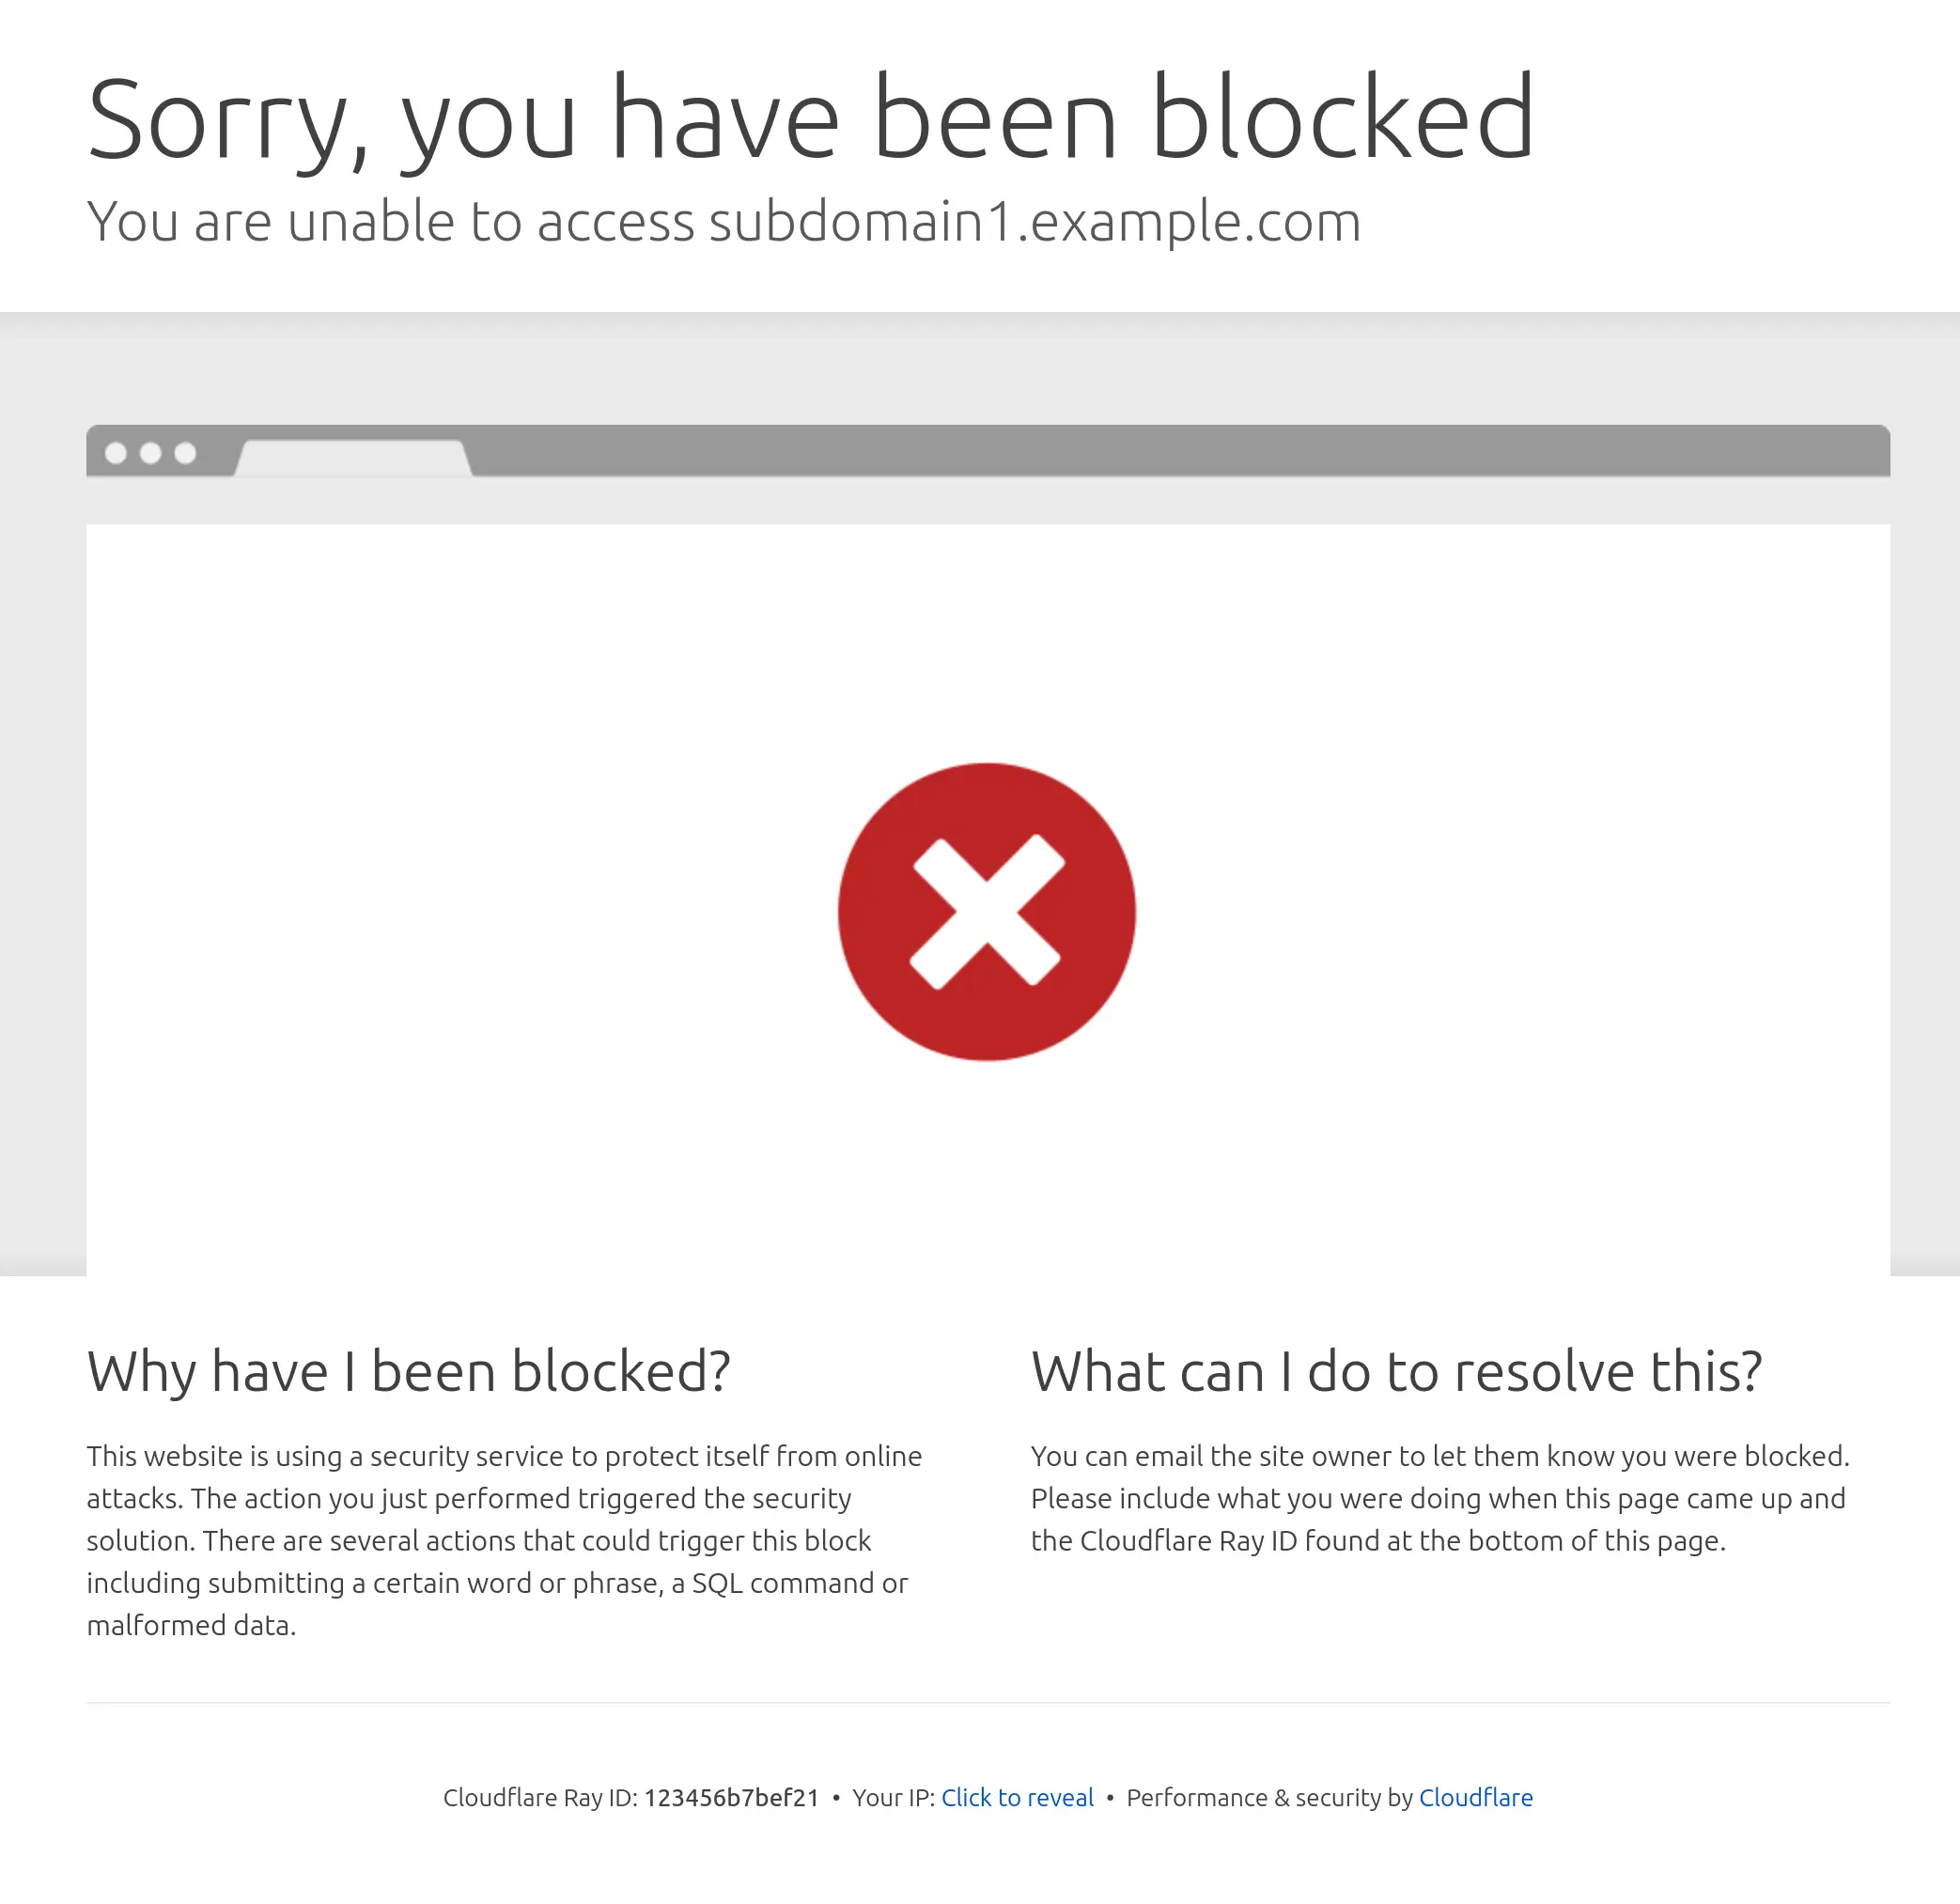
This is what will happen to anyone who is not using the valid certificate when they try to access your subdomain.
Leaving a path unprotected
You might want to have certain URLs still publicly available from your subdomain - for example, to use a webhook, and allowing the URL to be reachable so that the webhook can be triggered.
This can be done by setting up a rule in the Cloudflare WAF, and we can make it as an exception - we set up the rule to allow access to a specific URI only, and choosing the Skip action, so that it skips the mTLS rule:
We can set up a new rule, pick URI full, and put as a value the full path we want to make public https://subdomain1.example.com/123public.
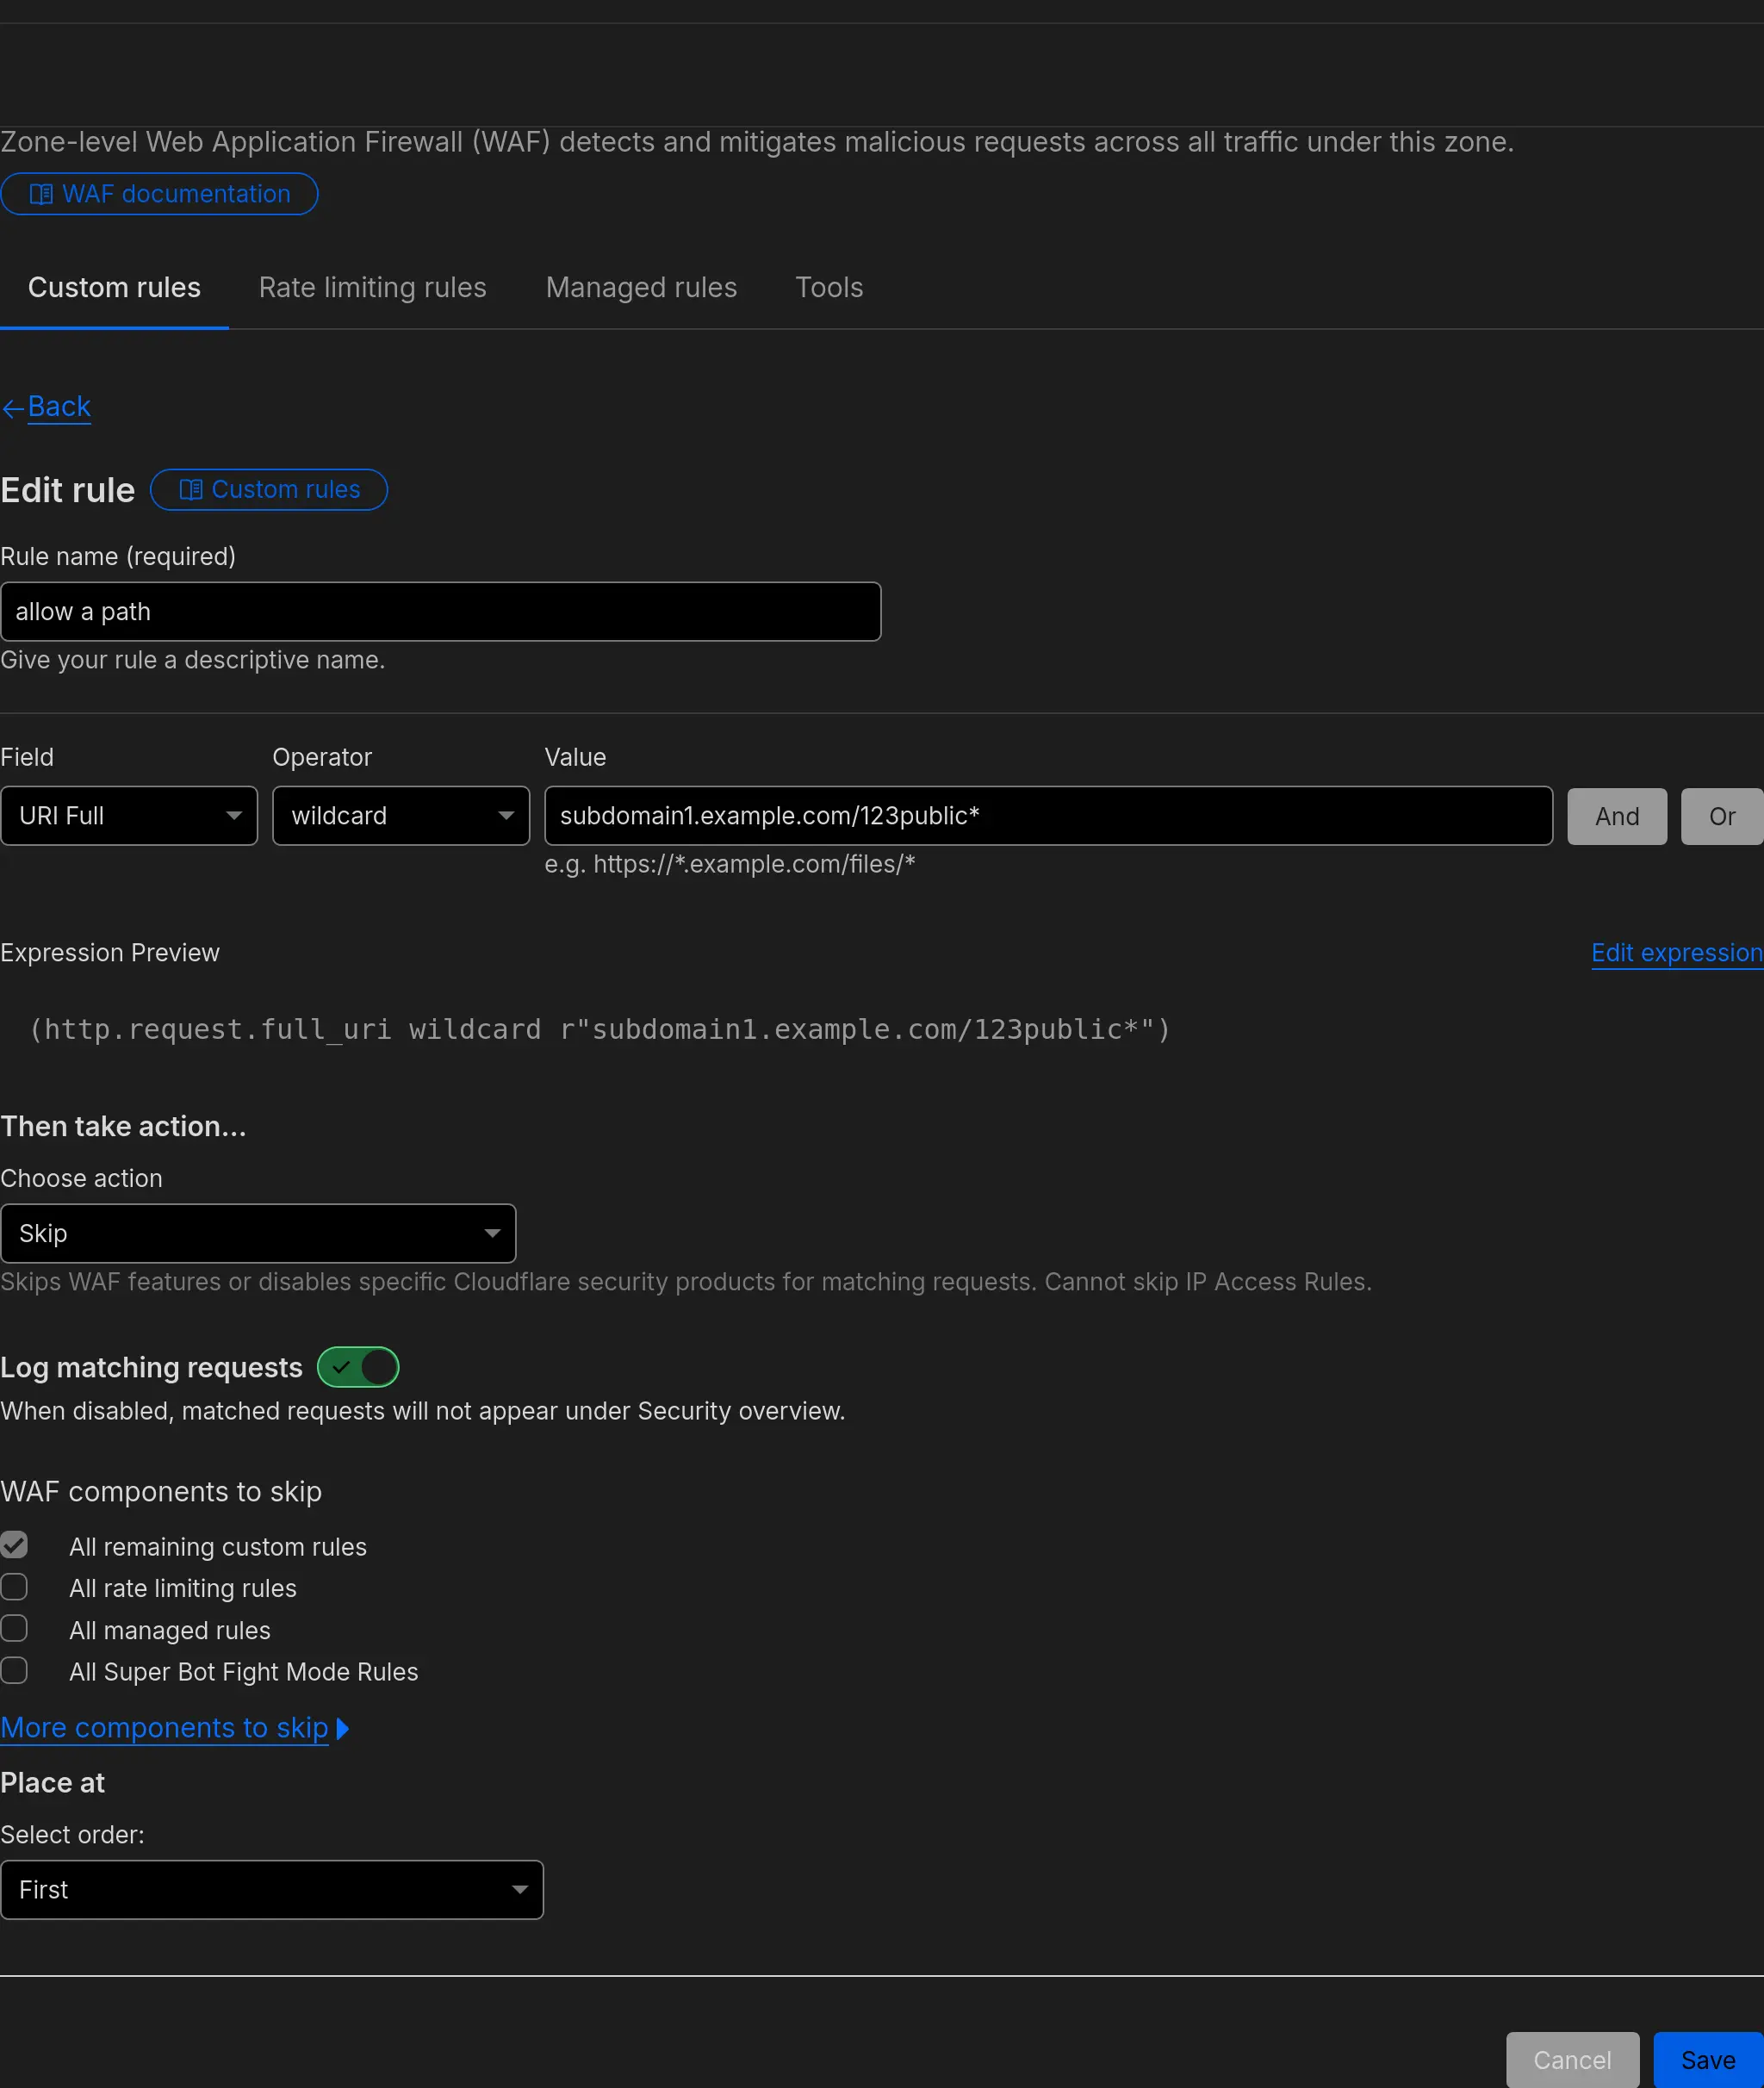
Based on the rule we had set up previously, anyone trying to access any URI except /123public on this subdomain will get the Cloudflare block page.
Adding the certificate to your devices
Of course, you still want to be able to access from your devices, so let’s go ahead and add the certificate to your client devices:
Adding the certificate to Firefox
Windows
In Windows, you can just download the .p12 certificate and double click on it. You will be prompted to add it to the Windows Certificate storage, from where the browser should automatically be able to import and use it.
Linux
Go to Settings → Privacy and Security → View Certificates, Your Certificates, click import, and select your .p12 file. You will be prompted for the passphrase, if you set one when exporting.
You can restart the browser, and now when you try to access subdomain1.example.com you will be prompted to select a certificate and actually access the page. If it doesn’t work immediately, try to do a hard refresh on your browser (usually CTRL+F5).
Success!
Adding the certificate to Chrome
Windows
In Windows, you can just download the .p12 certificate and double click on it. You will be prompted to add it to the Windows Certificate storage, from where the browser should automatically be able to import and use it.
Linux
Go to Settings → Privacy and Security→ Security → Manage certificates (under Advanced).
Click import and select the .p12 file. You will be prompted for the passphrase, if you set one when exporting.
You can restart the browser, and now when you try to access subdomain1.example.com you will be prompted to select a certificate and actually access the page. If it doesn’t work immediately, try to do a hard refresh on your browser (usually CTRL+F5).
Success!
Adding the certificate to Android apps
For Android, there are 2 ways of using this:
Some apps will use the Android built in certificate storage.
Transfer your certificate to the device and open it, you will be asked to Choose a certificate type, which by default picks VPN and app user certificate. Go ahead and import it, and you should name it to something recognisable (such as example.com so you know what domain it is meant to be used for).
The certificate will then be automatically be made available for use for apps such as Chrome, or Home Assistant.
You might see a pop up asking you to confirm that you wish to use the certificate. Go ahead and the app should then load the page/content successfully.
Firefox Android is unfortunately not compatible with mTLS certificates just yet.
Firefox Android is finally compatible with mTLS certificates, from version 138 onwards.
Other apps specifically require you to pick a certificate for use with them. You can usually find this option in their settings. Personally, I use Immich and the Paperless-mobile apps - both have this set up, where you need to specifically import the cert as a one-off step during the initial configuration. Once you do, you should be able to use the app as usual, and the certificate is automatically used to connect without any prompt.
Footnotes
-
This actually depends on the validity period of the certificate, but if you pick a 10 year validity, that is pretty much once in the lifetime of a smartphone. ↩
-
The Immich mobile app supports a dual set up, with internal and external URLs. This can be used as a workaround to the Cloudflare limitation, as videos larger than 100mb will upload when at home (or while my VPN is connected). ↩
-
If you have a more complex setup, Caddy can be used to redirect a /path/ to a subdomain and therefore enable mTLS for that section of your website. You could do this by redirecting
example.com/admintoadmin.example.com, and protecting theadminsubdomain. ↩ -
RSA is meant to be more compatible, and ECC is supposed to be more efficient, in that it provides the same Security Level with a smaller size. ↩