Seeedstudio reached out to me on the Home Assistant community forums, on the back of some posts I did related to the E-paper dashboard, and gave me the opportunity to try their new ReTerminal E1002 colour ePaper display, providing me with a free unit.
All the opinions shared below regarding the unit are my own. There are no affiliate links nor do I get any commission from anything.
Seeedstudio have recently released their ReTerminal E1002 full colour epaper displays. These are a further iteration of the previous XIAO 7.5” ePaper panel, featuring an upgraded enclosure, ESP32 (a S3 instead of the previous C3), and, more importantly, the new Spectra 6 7.3” full colour ePaper display. This is still epaper, meaning you can get some very decent battery duration - we’re talking weeks rather than days, as you would with a traditional display.
The E1002 colour epaper display with a colour photo being displayed.
One downside of the colour epaper display is that it has a very long refresh time. It will take around 15 seconds for the screen to update, with some jarring flashing on the screen. The information I display on these dashboards is rather static, so I am only updating it once per hour.
The unit does have a hole for wall mounting, and 3 buttons which you can map at your will. With ESPHome, you can even use them to trigger actions on your Home Assistant instance. I have chosen to use them simply as navigation between multiple dashboard pages.
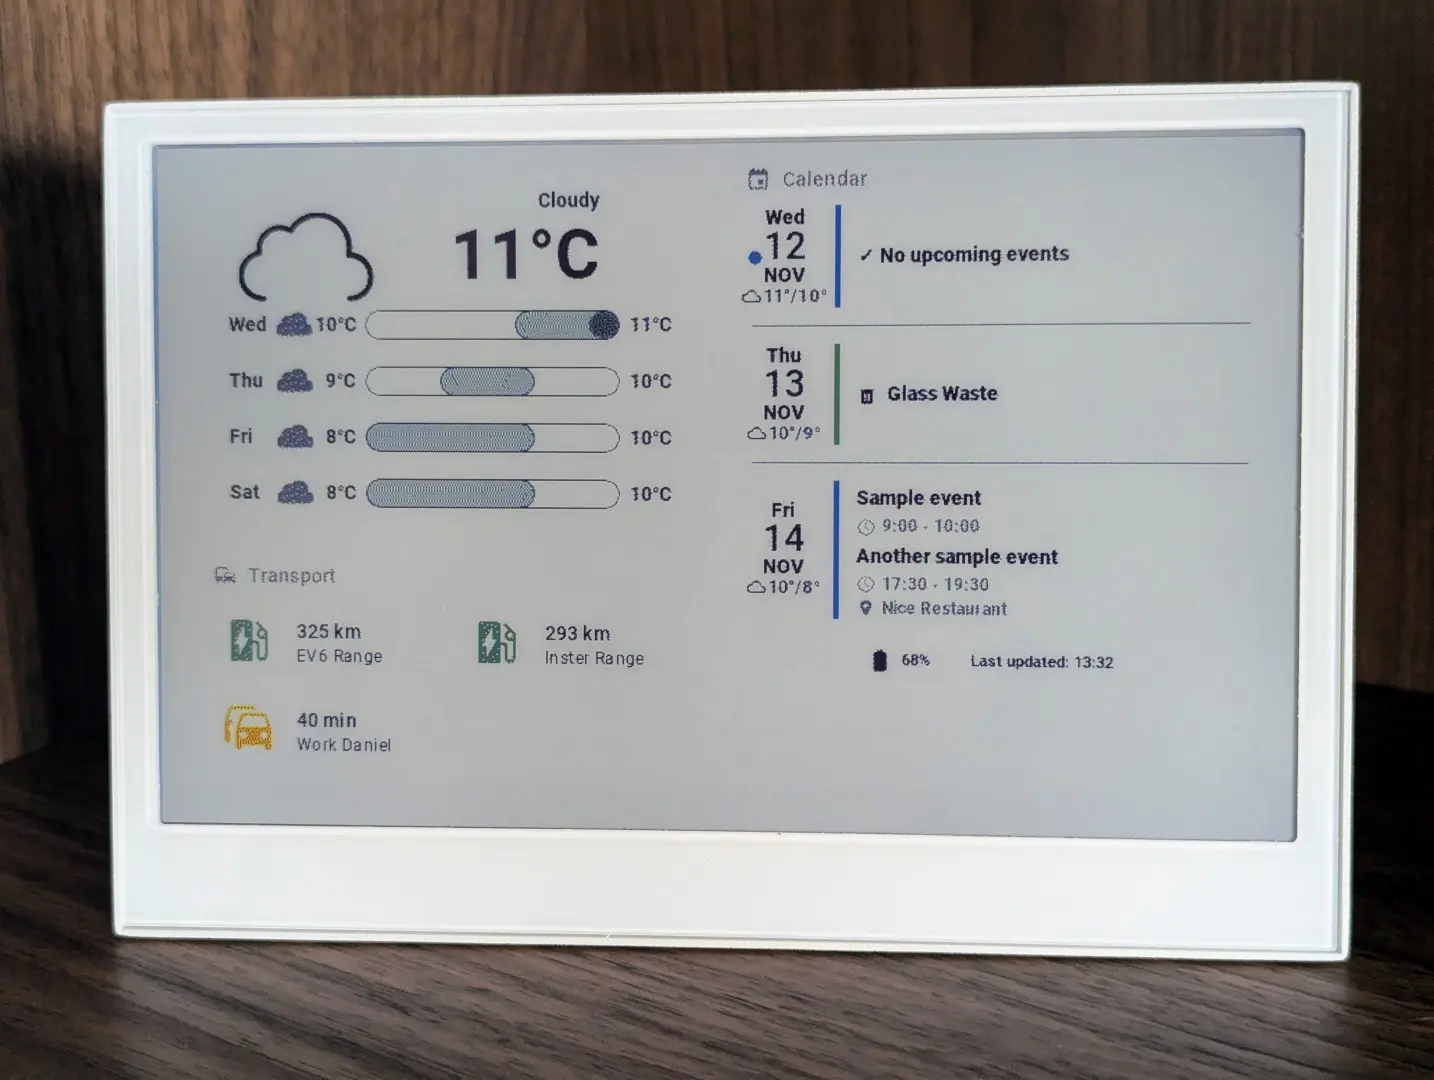
The E1002 colour epaper displaying an Home Assistant dashboard.
A wall dashboard that blends in
My use case for this device is to use it as a display for a Home Assistant dashboard, showing relevant information at a glance, while integrating neatly with the existing decor. The size means it still fits inside an IKEA frame, if you prefer to wall-mount it more discreetly. It does not completely fill the frame, but if you use the frame’s passepartout it will mask the difference. If you can align it properly, it can actually be made to fit perfectly, without gaps.
In my case, I am using the mounting whole on the E1002, and then placed a bit of sponge on top of the unit, which holds it at the exact height. I have used the metal clips on the frame itself to provide additional hold on the sides, making sure it stays perfectly centered.
The Xiao 7.5" monochrome epaper on the left vs the E1002 colour epaper on the right. Both are shown inside a Ikea photo frame.
That is my case. I prefer my home not to look smart, and prefer for things to be automated rather than having to interact with my smart home via a dashboard. However, there are plenty of scenarios where I want to have access to information at a glance. That is why I like having a dashboard in the main hallway showing information such as the weather, calendar appointments, range on our EVs, or the driving time estimate to work/the next calendar appointment.
I have a smart photo frame in my kitchen, which also allows me to display and interact with Home Assistant, and the same principle applies. It shows photos until you tap the screen and that’s when the dashboard is displayed. It’s an entirely different kind of device, with a different purpose.
The Puppet add-on for Home Assistant
Similarly to what I did previously with my epaper dashboard, I am using the Puppet add-on to grab a Home Assistant screenshot with the correct resolution and colour settings, and then retrieve it with ESPHome.
Puppet was recently updated1 to add support for dithering and presets for displays such as this Spectra6 display, as well as adding a web UI that can be used to configure the URL with the different available options and seeing a preview. You can select the different settings and choose which dashboard to screenshot. If you are not entirely happy with the results, you can further try different dithering settings, or adding a theme.
To get the image automatically sized and adapted for the ReTerminal E1002, append ?device=seeed-reterminal-e1002 at the end of the image URL from Puppet. In this example, I pass the &theme=Graphite+Light as an additional argument:
This can also be configured via the web UI, you can select the device and it should give you a preview and the URL to copy.
Integrating with ESPHome and Home Assistant
You can refer to the Seeedstudio wiki for examples of basic configuration and different functionalities.
I have chosen to do something a bit more complex here, to really make the best use of the device.
For this example, I have set up the dashboard to load 4 different pages (home, energy, plants and wallpaper) from my eink-e1002 dashboard.
Home Assistant helper and automation
I have created a input_select helper in Home Assistant, named input_select.reterminal_e1002_page_selector, with possible values home, energy, plants and wallpaper, ie matching the pages on the dashboard.
The ESPHome code will still work without it - it will just default to the home page, and you can then navigate through the pages using the buttons on the device.
The idea is to allow me to dynamically choose what should be displayed depending on context.
Here is my sample automation, and what it does:
If any plant is in state “problem”, display the Plants Dashboard page2;
If time between 9.30am and 1pm, and current and forecasted solar energy production is high, display Energy Dashboard page;
If there are any calendar.family events today (based on a helper), display Home Dashboard page;
If nobody is home, display Wallpaper Dashboard page;
If Battery is under 5%, send Notification;
Else, Default, Display Wallpaper Dashboard page.
In my case, for the wallpaper dashboard page, I am using a single picture card, and using Immich Kiosk to generate the URL that returns photos from our personal Immich photo library.
Automation .yaml code
I use the “delay” as a weighting. The more important pages to display have a larger delay so that they override the less important ones.
alias: ReTerminal E1002 dashboard page selectordescription: ""triggers: - trigger: time_pattern minutes: /30conditions: []actions: - choose: - alias: If any plant is in state "problem", display the Plants Dashboard page conditions: - condition: template value_template: >- {{ states.plant | selectattr('state', 'eq', 'problem') | list | count > 0 }} sequence: - action: input_select.select_option metadata: {} data: option: plants target: entity_id: input_select.reterminal_e1002_page_selector - alias: >- If time between 9.30am and 1pm, and current and forecasted solar energy production is high, display Energy Dashboard page conditions: - condition: time after: "09:30:00" before: "13:00:00" weekday: - sat - fri - thu - wed - tue - mon - condition: numeric_state entity_id: sensor.energy_next_hour above: 1.5 - condition: numeric_state entity_id: sensor.grid_export_power above: 1500 sequence: - delay: hours: 0 minutes: 0 seconds: 1 milliseconds: 0 - action: input_select.select_option metadata: {} data: option: energy target: entity_id: input_select.reterminal_e1002_page_selector - conditions: - condition: state entity_id: sensor.next_calendar_family_event_date state: - "0" sequence: - delay: hours: 0 minutes: 0 seconds: 3 milliseconds: 0 - action: input_select.select_option metadata: {} data: option: home target: entity_id: input_select.reterminal_e1002_page_selector alias: >- If there are any calendar.family events today, display Home Dashboard page - alias: If nobody is home, display Wallpaper Dashboard page conditions: - condition: state entity_id: zone.home state: - "0" sequence: - delay: hours: 0 minutes: 0 seconds: 5 milliseconds: 0 - action: input_select.select_option metadata: {} data: option: wallpaper target: entity_id: input_select.reterminal_e1002_page_selector - alias: If Battery is under 5%, send Notification conditions: - condition: numeric_state entity_id: sensor.e1002_battery_level below: 5 - condition: sun before: sunset after: sunrise sequence: - action: notify.html5 data: message: The ReTerminal E1002 battery is under 5%. Please recharge soon. title: ReTerminal Low Battery default: - alias: Display default Wallpaper Dashboard page action: input_select.select_option metadata: {} data: option: wallpaper target: entity_id: input_select.reterminal_e1002_page_selectormode: single
ESPHome Code and functionality
This uses the native Esphome component for the color epaper;
3 buttons on top (page navigation back/forward + refresh / deep sleep interrupt);
Deep sleep after 90s, for longer battery life - the device wakes up every hour, displaying the page set by input_select.reterminal_e1002_page_selector (or home, by default). It will display the wallpaper page during the night, with a longer deep sleep between 10pm and 6am. Using any of the buttons resets the deep_sleep timer.
Led light on the side, stays on (green) when the device is awake.
Battery voltage and % monitoring, reported into Home Assistant at each 90 seconds (the wake up interval)
Temperature and humidity sensor built in, reported into Home Assistant.
I wrote most of this code, based on the Seeedstudio’s wiki and ESPHome’s documentation, but I used a LLM to assist me with the lambdas part of the code - I don’t code for a living, and I can’t figure that out myself.
This code has been updated for ESPHome 2025.11.X, and that would be the minimum version required. This version implemented a new display model, model: Seeed-reTerminal-E1002, which automatically sets all the required pins for the display to work on this device, so I have removed all the extra lines from the code.
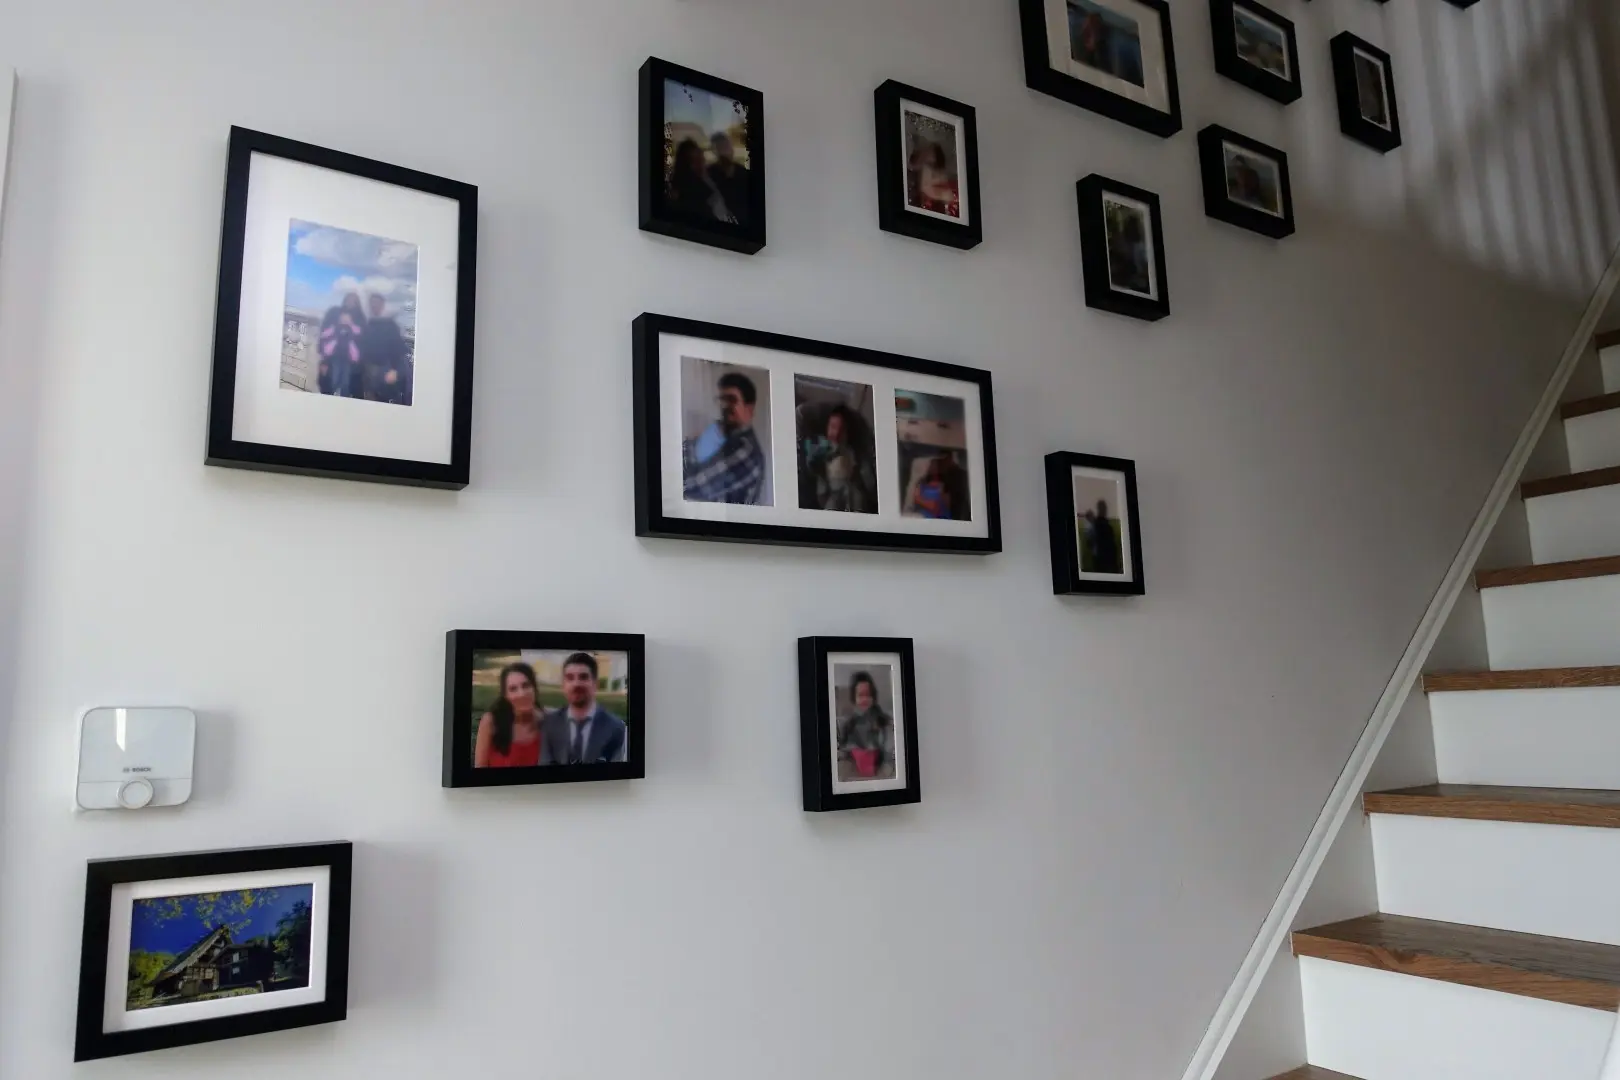
A picture can be worth a thousand words, so that’s why I decided to show you how this look on our wall. The epaper is the photo on the bottom left (the only unblurred one). The epaper blends in superbly when showing a photo, rather than a dashboard. This meets my goal. Whenever the context demands it, the automation driven by Home Assistant will display the dashboard page that will give me the information that I need in that moment.
Spot the epaper. A photo being displayed in the epaper blends in really well with regular framed photo prints.
Battery life update
After a couple of months “live”, I can better comment on the actual battery life.
With the overnight deep sleep and 60 minutes between updates ( as in the example code above), I can get a full month out of the battery.
In my personal device, I have updates every 45 minutes (with a long deep sleep overnight) and I get almost 25 days out of the battery.
This is pretty much in line with what I expected based on the previous model.
Footnotes
The new functionality is available since version 2.4.0 of the Puppet add-on. ↩
Previously I was using a discrete list of my plants. As these sometimes change, I’ve updated the code to include a template that will pick any plant sensor in problem status instead. ↩